So I got out my tools and hacked away..... It ended up being a DIME.... Rolling back and forth in a slot/groove.

Basically looked at the following pic:

Do the following on each side of the center console.
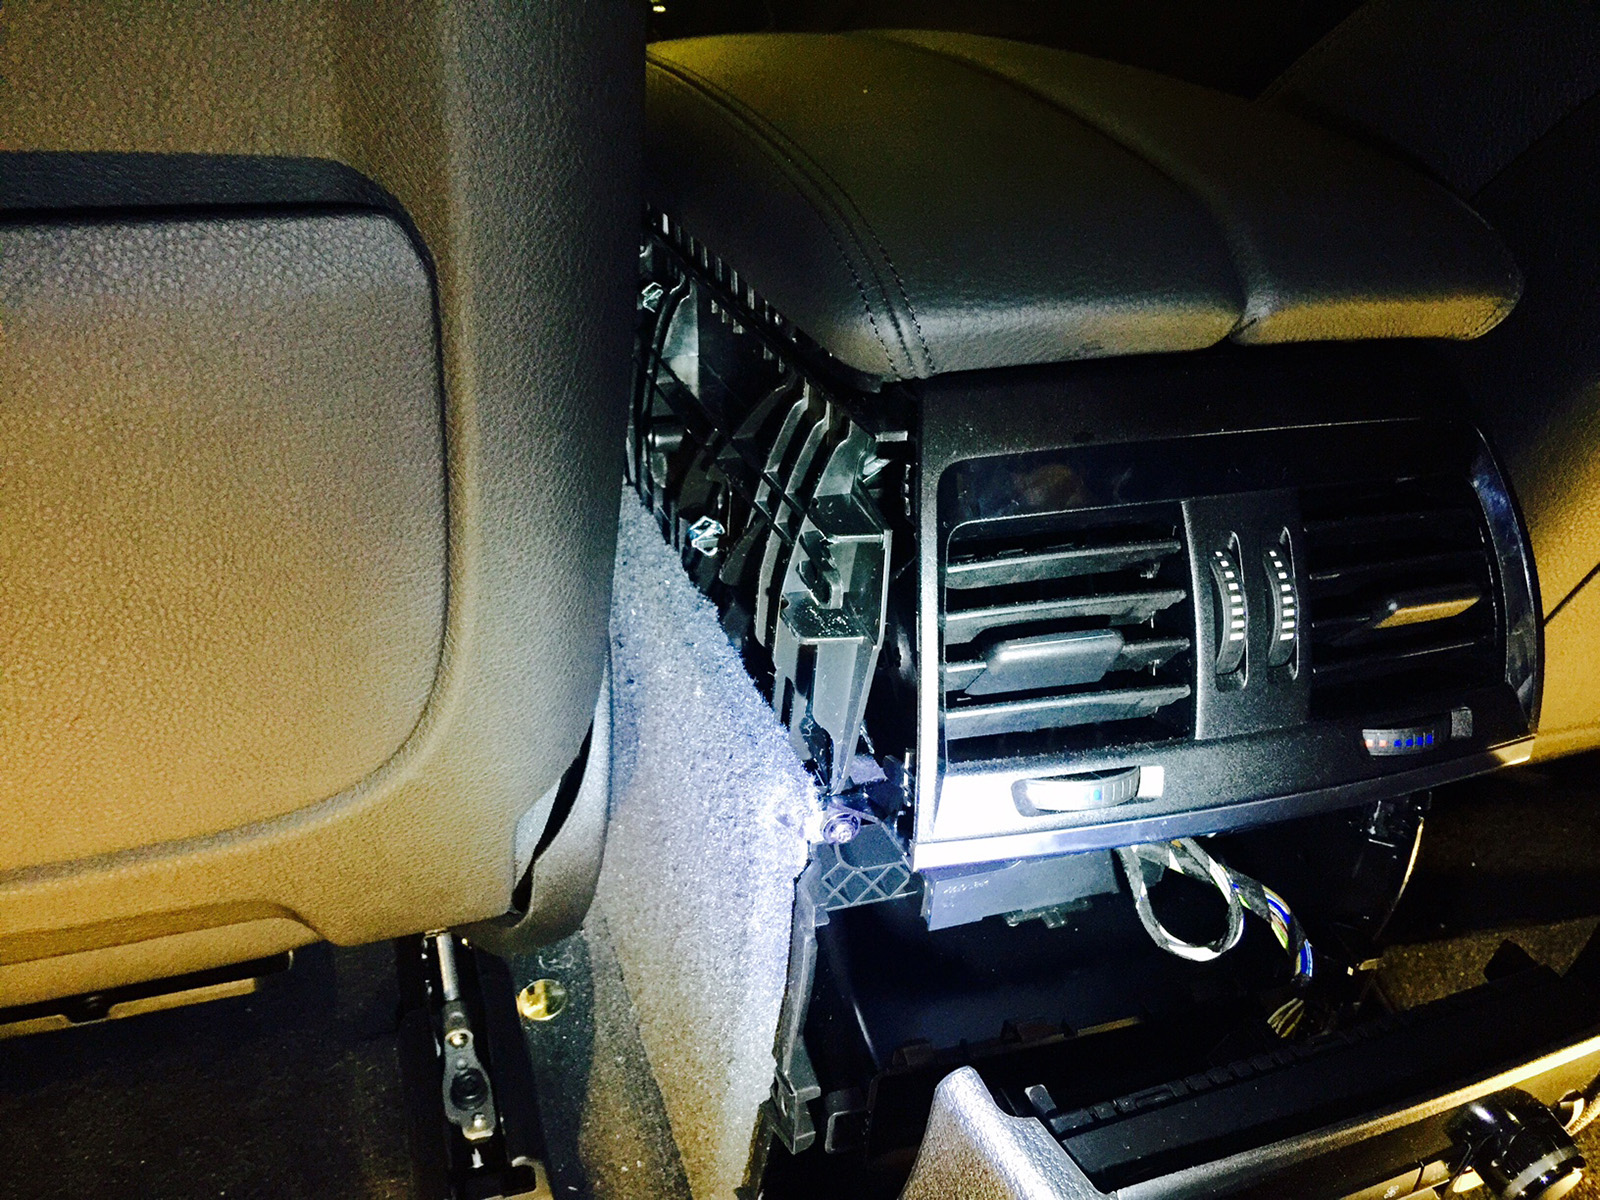
1.)Remove top panel that is between center console storage doors (must be opened for access) and center console rear air vent using vinyl tool or other non-scratch tool.
2.) Detach panel at the rear of center console (part with rear AC controls) by pulling at the sides forcibly.
3.) Remove two screws on top and screw at each bottom corner to remove center console rear air vent as it has some prongs that hold the middle side vinyl section in place.
4.) Remove screw from middle carpet trim from end in footwell
5.) Remove middle carpet trim by pulling off (clips)
6.) Then remove upper vinyl trim (part 13) by pulling off (clips) from footwell portion back.... Be careful in the rear portion as it has a catch and needs to be slid off the back of the center console.
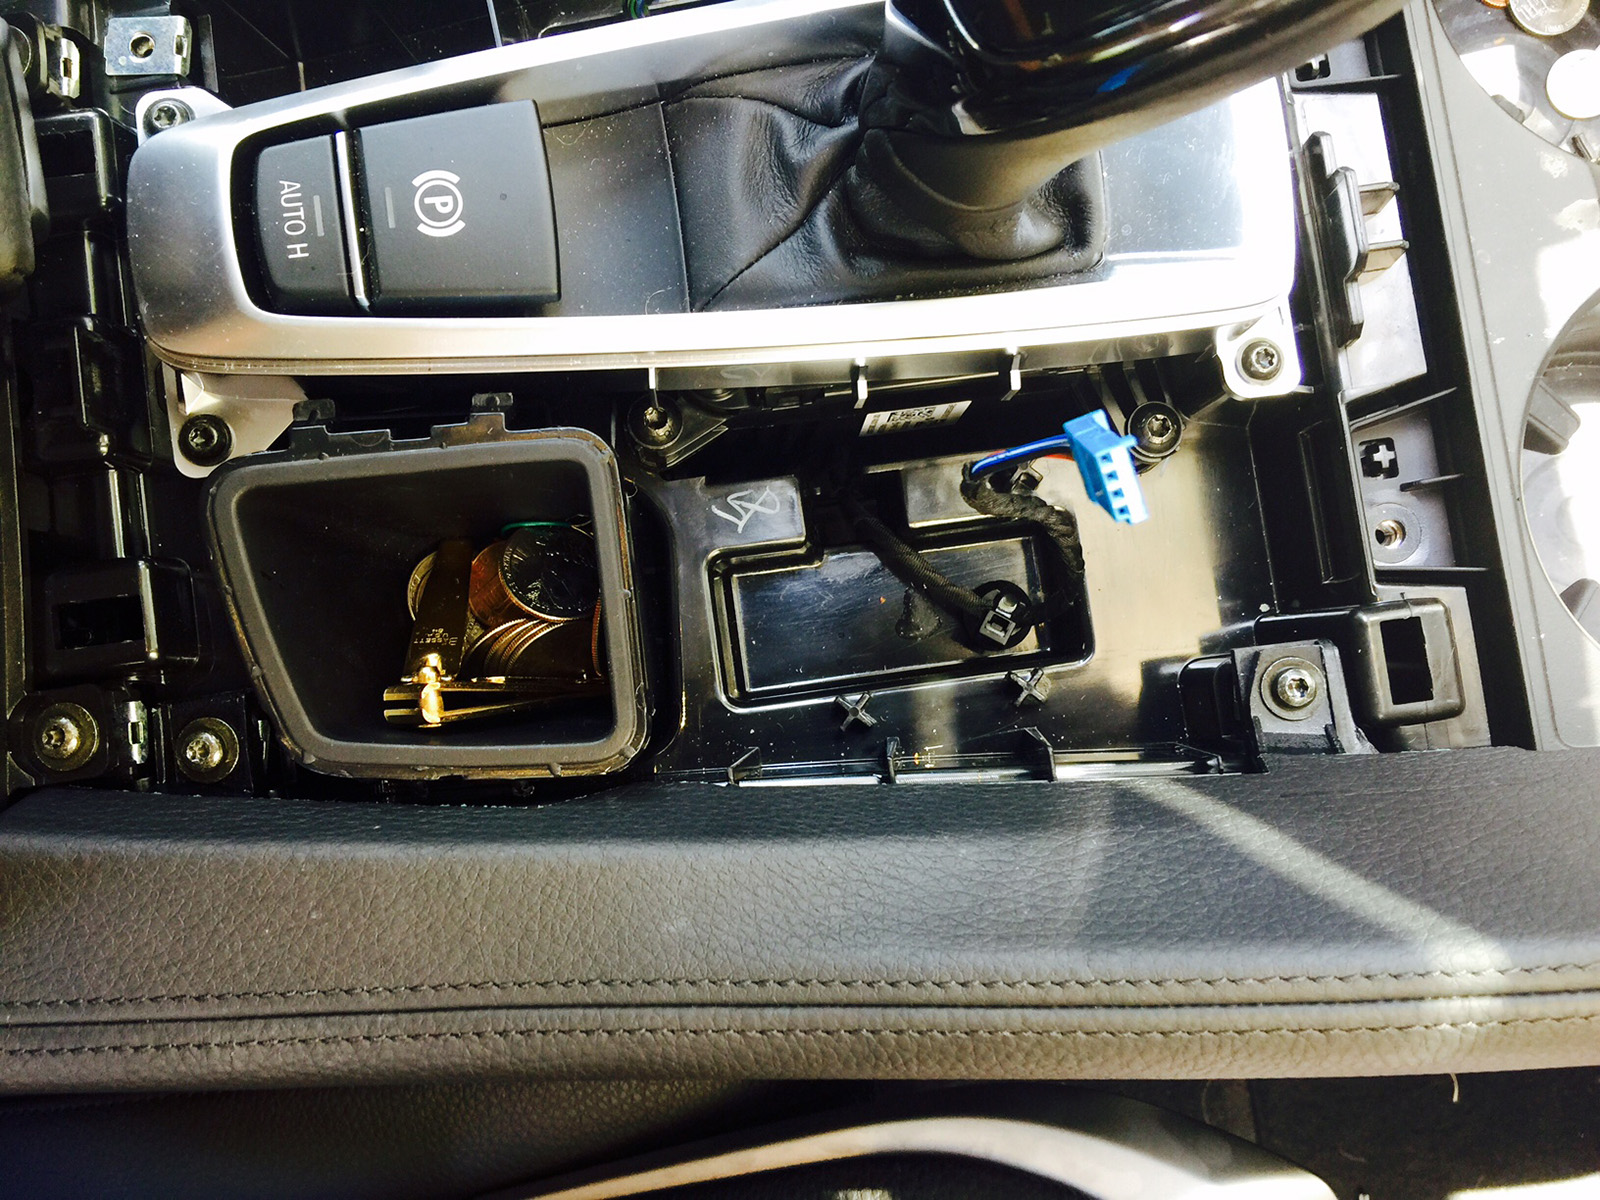
7.) Pull up on the front of part (8) which has the iDrive controller and surrounds the shifter. It's rough but will come out. Disconnect wires from idrive and park assist/camera buttons
8.) remove two screws that are attached to side leather bolster (part 15).
9.) Remove side bolster by lifting from the part closest to center compartment
10.) Remove 4 screws on the side that are screwed into cupholder (7) and side bolster holder as well as a screw that is next to the lighter/ashtray on top at the end of bolster holder piece.
11.) Pull up and side bolster holder comes out
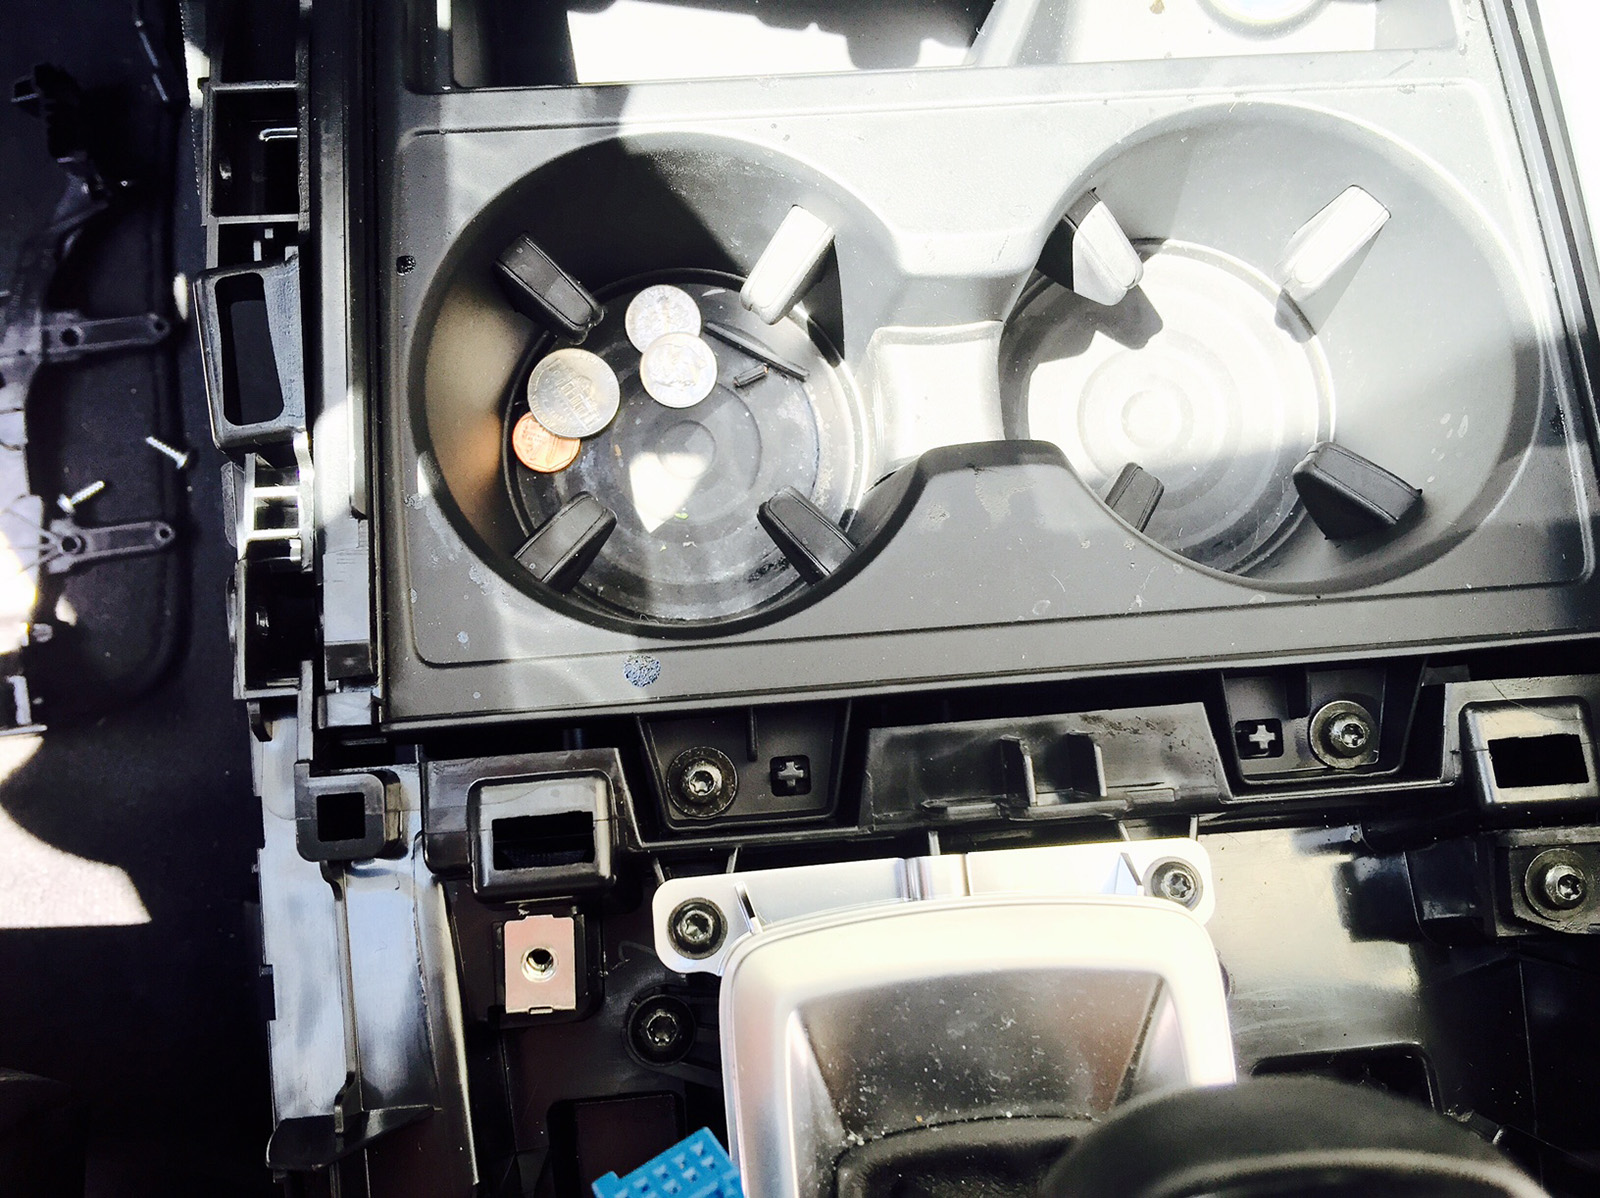
12.) Remove screws at the front of the cupholder in front of the shifter.
13.) You should be able to lift up on the cupholder compartment and see with a flashlight what is underneath and remove it, most likely right down the center in a groove.
* ...When you put the middle vinyl sections back on, make sure to slot it UNDER the portion of bottom carpet siding and not over it. Also, look for the rear clips on the bottom carpet portion when putting it back, as they need to be slid over some plastic so it goes flush.
1.)Remove top panel that is between center console storage doors (must be opened for access) and center console rear air vent using vinyl tool or other non-scratch tool.
 2.) Detach panel at the rear of center console (part with rear AC controls) by pulling at the sides forcibly.
3.) Remove two screws on top and screw at each bottom corner to remove center console rear air vent as it has some prongs that hold the middle side vinyl section in place.
 4.) Remove screw from middle carpet trim from end in footwell
5.) Remove middle carpet trim by pulling off (clips)
6.) Then remove upper vinyl trim (part 13) by pulling off (clips) from footwell portion back.... Be careful in the rear portion as it has a catch and needs to be slid off the back of the center console.

 7.) Pull up on the front of part (8) which has the iDrive controller and surrounds the shifter. It's rough but will come out. Disconnect wires from idrive and park assist/camera buttons
8.) remove two screws that are attached to side leather bolster (part 15).
 9.) Remove side bolster by lifting from the part closest to center compartment
10.) Remove 4 screws on the side that are screwed into cupholder (7) and side bolster holder as well as a screw that is next to the lighter/ashtray on top at the end of bolster holder piece.

 11.) Pull up and side bolster holder comes out
12.) Remove screws at the front of the cupholder in front of the shifter.
 13.) You should be able to lift up on the cupholder compartment and see with a flashlight what is underneath and remove it, most likely right down the center in a groove.
* ...When you put the middle vinyl sections back on, make sure to slot it UNDER the portion of bottom carpet siding and not over it. Also, look for the rear clips on the bottom carpet portion when putting it back, as they need to be slid over some plastic so it goes flush.