|
||
 DIY - BMW M Performance Front Lip and Rear Diffuser Install
|
||
Post Reply |
|
|
Thread Tools | Search this Thread |
|
||
|
DIY - BMW M Performance Front Lip and Rear Diffuser Install
|
||
Post Reply |
|
|
Thread Tools | Search this Thread |
| 09-18-2018, 08:27 PM | #155 | ||
|
Master of one

431
Rep 486
Posts |
Quote:
Quote:
|
||
|
Appreciate
0
|
| 09-18-2018, 09:59 PM | #156 |
|
Second Lieutenant
 169
Rep 231
Posts |
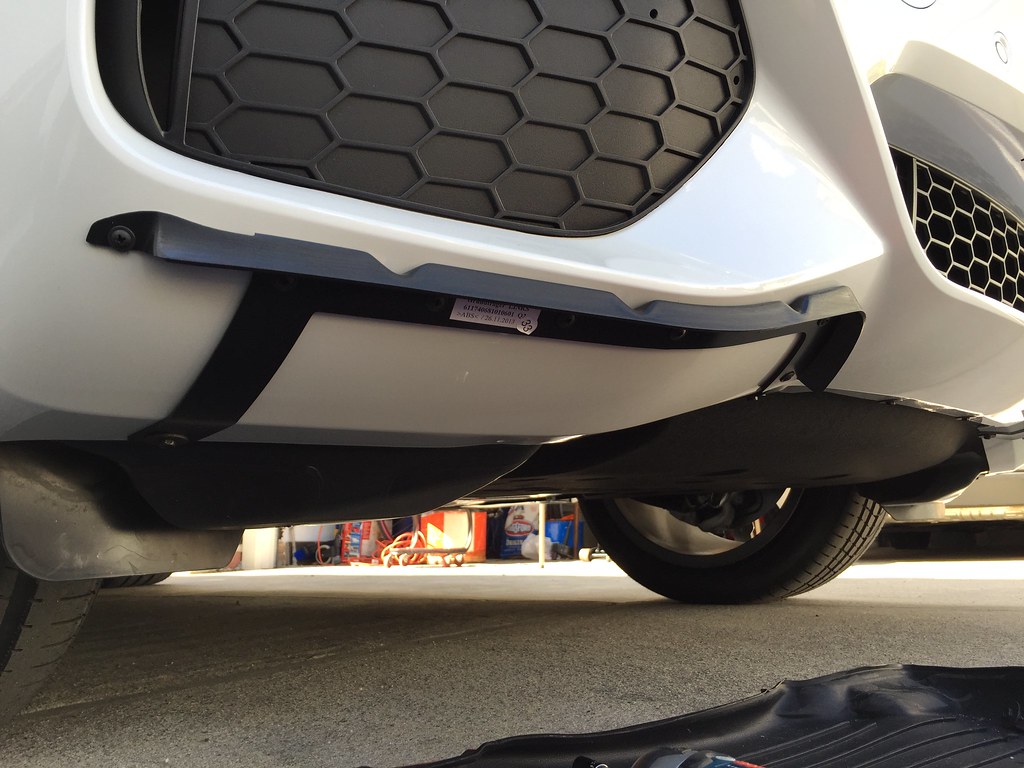
I screwed the bracket onto my bumper and used lots of vhb tape, let it sit for a few days to set. felt strong, about a week in it came off on the highway doing about 85. the tape just isn't strong enough to hold all that downforce. I had an RW lip by the way. just got my new lip in, goin with beta link and fabricating a middle support bracket.
|
|
Appreciate
0
|
| 09-19-2018, 10:53 PM | #157 | |
|
Old Time Newbie

51
Rep 85
Posts |
Quote:
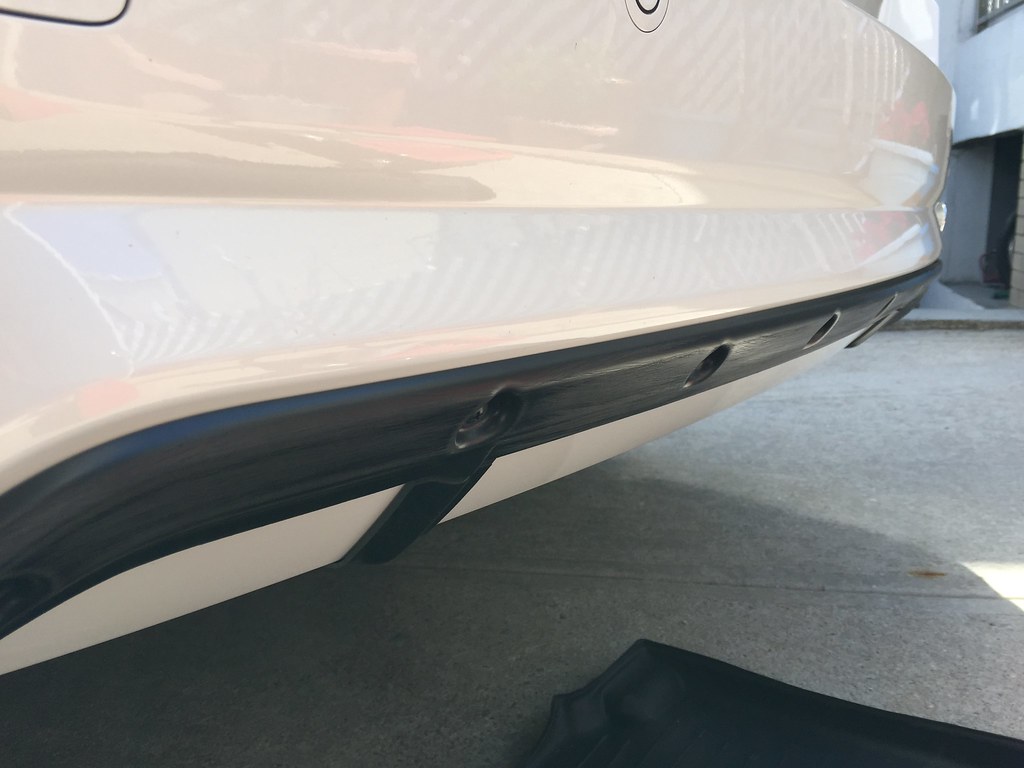
Took them a day to get back at me for a installer suggestion and instructions for return. In the meantime, I have brought my F15D to an accredited BMW body shop and asked them to install. They did install using betalink adhesive as there was no way that the double sided tape will hold the diffuser because of the gaps. The fit wasn't the greatest-I would say it's a good 90-92% satisfaction on my part to see it installed and turned out the way it did. I guess it's the trade-off for getting the aftermarket instead of the OEM. I am not thinking of getting the front lip at this time though. I don't think I can recommend the rear diffuser from JL though... Maybe other aftermarket CF seller has a better fitment than theirs or maybe just stick to the OEM. |
|
|
Appreciate
0
|
| 09-20-2018, 10:51 AM | #158 | ||
|
Lieutenant
808
Rep 475
Posts |
Quote:
|
||
|
Appreciate
0
|
| 09-20-2018, 02:05 PM | #159 |
|
Major General

3240
Rep 5,066
Posts |
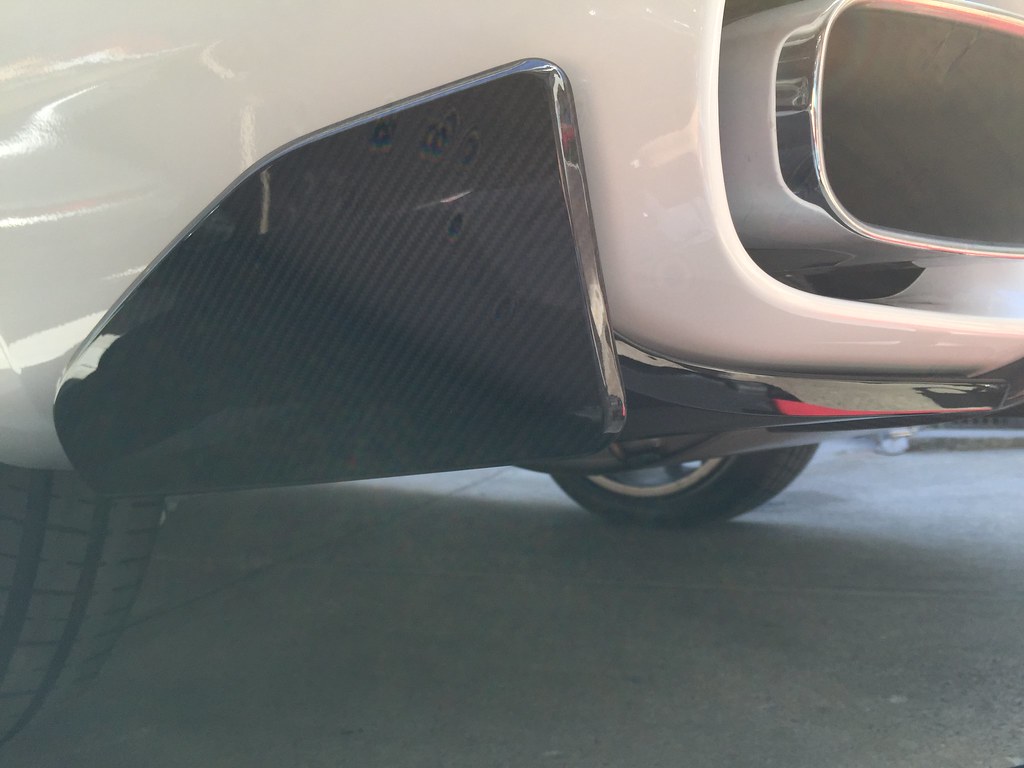
Stick with OEM.... many people have already done the aftermarket and found the figment being off. Not to mention the quality of the weave deteriorating after a year or so.
__________________
2015 F15 X5 35i Msport Space Grey M Performance parts MPPK, MPE
|
|
Appreciate
1
F15d_RN50.50 |
| 09-20-2018, 03:24 PM | #160 |
|
Major General
5450
Rep 8,815
Posts |
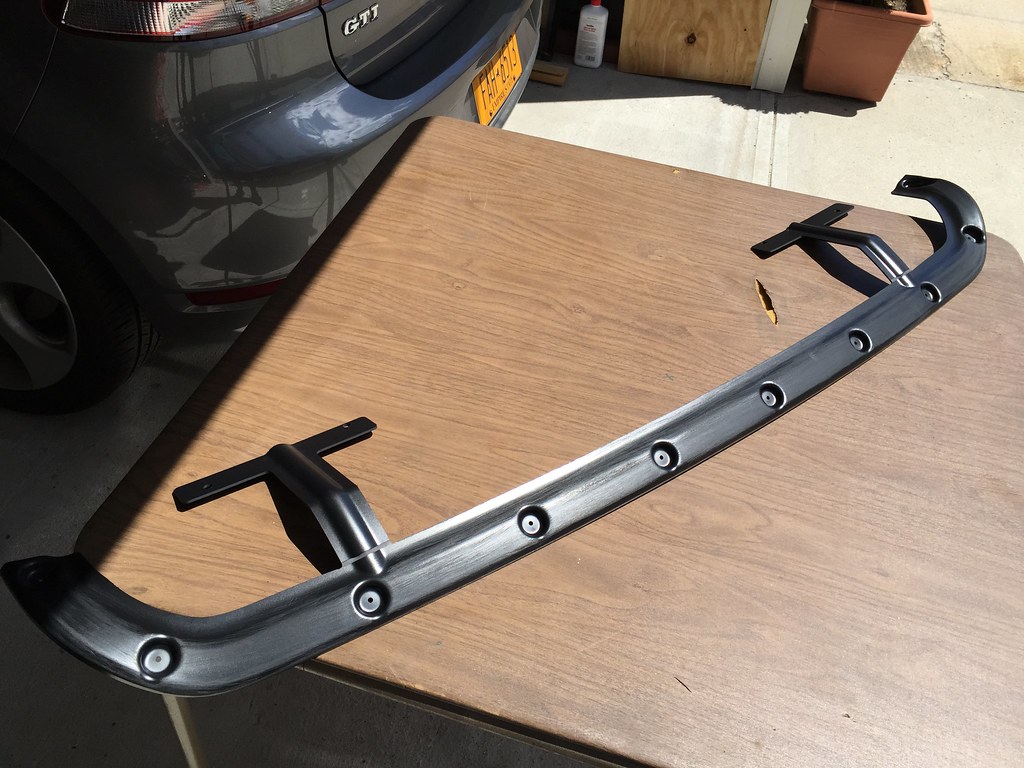
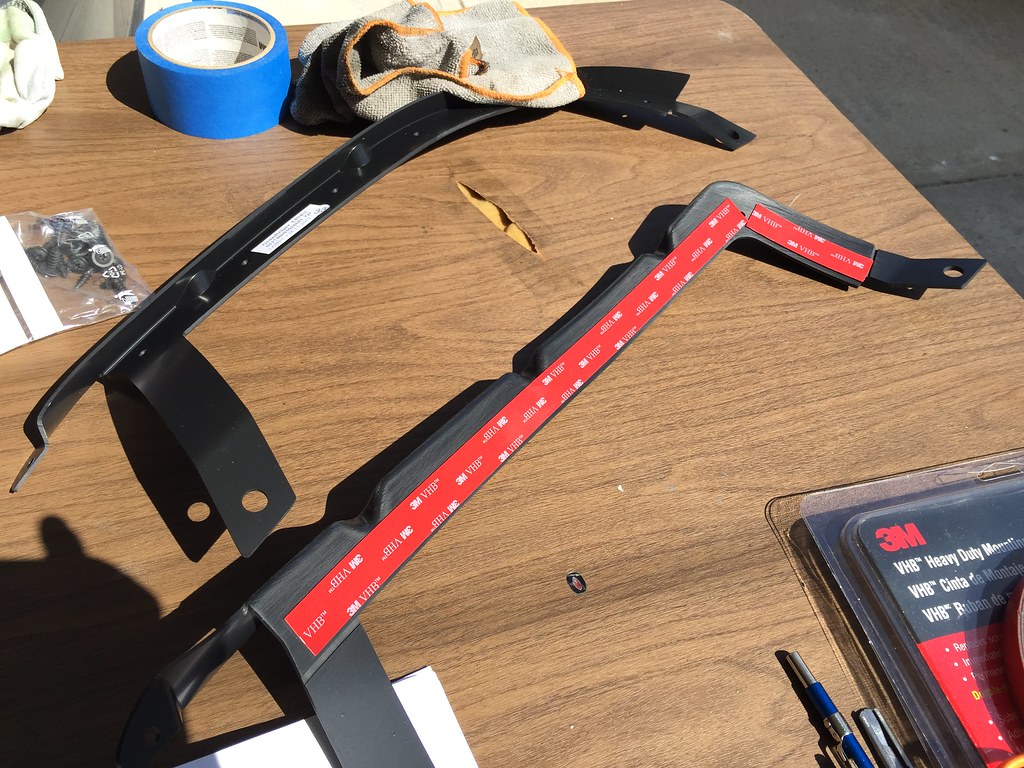
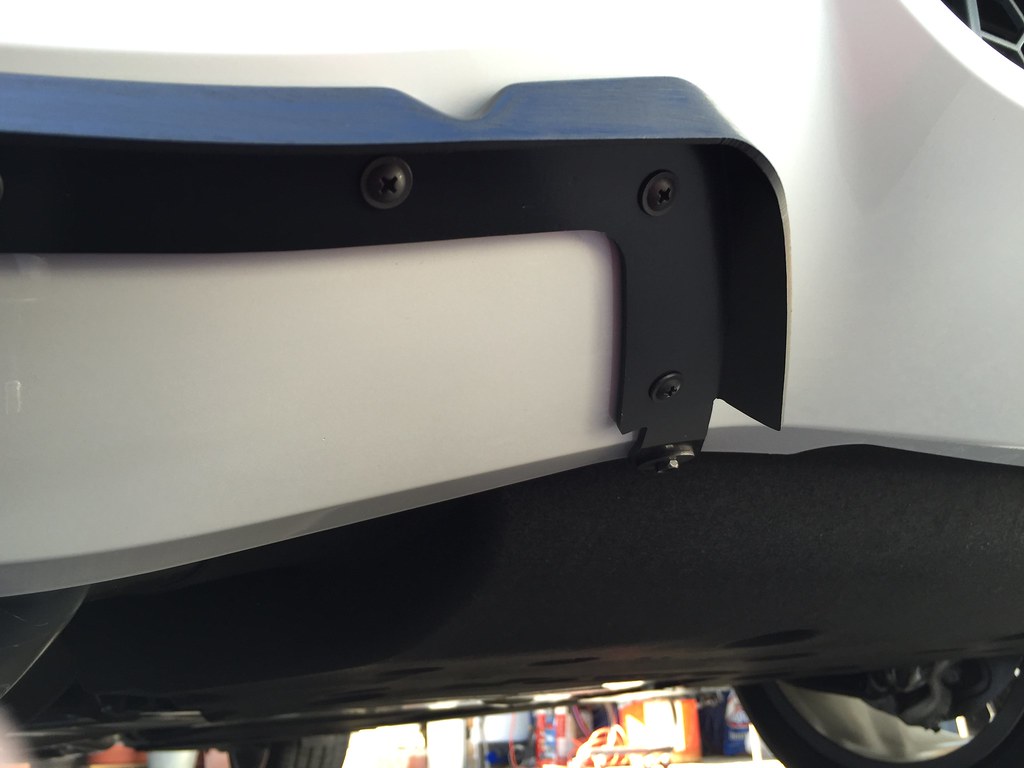
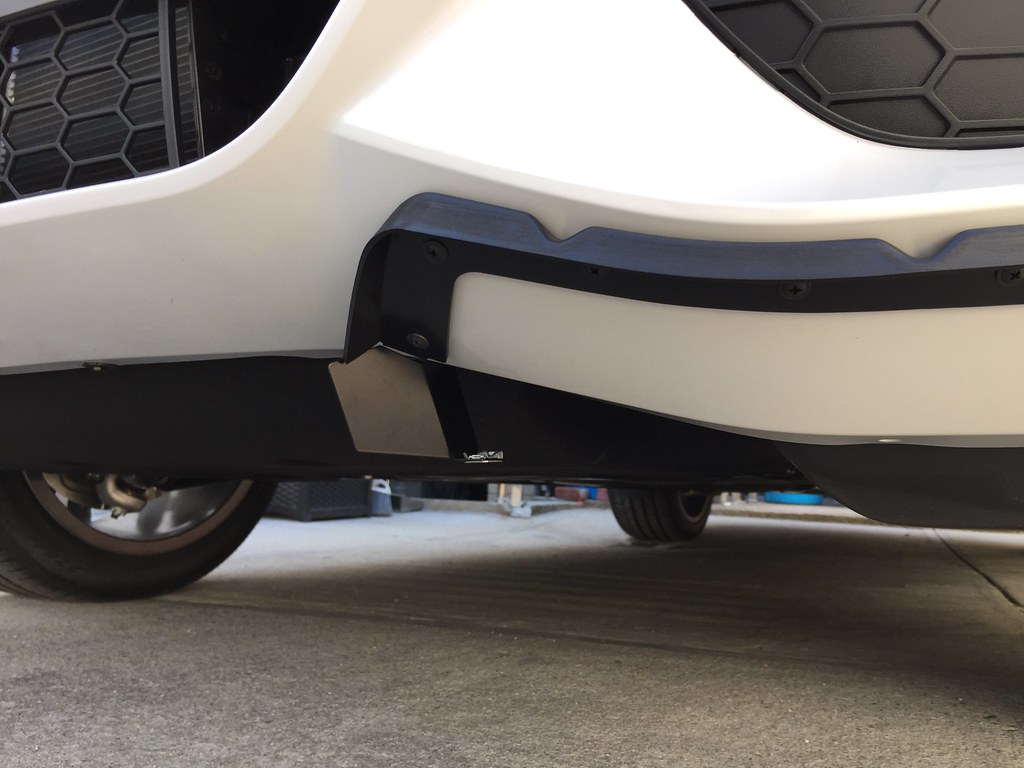
Are you guys with the OEM lip properly prepping the back side of the carbon pieces and brackets where the VHB tape bonds to? I sanded mine down and wiped it with alcohol and my lip never flew off after putting 7K miles on it. Also heating the tape up also makes the bond alot more solid. I did my install on a hot summer day so I didn't have heat it up anymore but I've tried using the tape in colder weather and it definitely does not have nearly the same bite. Also removing the lip after initial contact will greatly reduce the tapes effectiveness. I've known people that has pulled the lip on and off trying to get the fitment perfect and that will certainly make the bond weaker.
No comment about those using afermarket because most don't even come with brackets and correct contour to fit the car so I can see why using the tape wouldn't be enough to keep it adhered to it.
__________________
 |
|
Appreciate
0
|
| 09-20-2018, 05:29 PM | #161 | |||
|
Old Time Newbie
51
Rep 85
Posts |
Quote:
if i can redo it, i will get oem. |
|||
|
Appreciate
2
mindcontrollerone808.00 BMW_x5_Msport106.50 |
| 01-08-2019, 06:46 PM | #162 |
|
Ultimate Driving Machine E92ESS625 M3/G05 X5 Msport 40i Individual
459
Rep 2,002
Posts
Drives: 2011 E92 M3 DCT/ESS 625 kit
Join Date: Jan 2014
Location: Georgetown,ON
|
Thanks for this great write up. Followed all ur instructions and couldn't be happier using 3m adhesive
__________________
"The Ultimate Driving Machine"
2011 E92 M3 supercharged ESS 625 2016 F15 X5 Msport 35i |
| 01-08-2019, 08:13 PM | #163 | ||
|
Master of one
431
Rep 486
Posts |
Quote:
Quote:
|
||
|
Appreciate
2
Russmov1328.00 Installsplus458.50 |
| 01-08-2019, 08:17 PM | #164 | |
|
Major

1328
Rep 1,343
Posts
Drives: 2015 BMW X5 xDrive 35i
Join Date: May 2018
Location: Ontario
|
Quote:
__________________
2015 BMW X5 xDrive 35i-Current
2016 BMW X4 xDrive 28i-Sold 2014 Lincoln MKX-Sold |
|
|
Appreciate
0
|
| 01-08-2019, 08:20 PM | #165 | ||
|
Ultimate Driving Machine E92ESS625 M3/G05 X5 Msport 40i Individual
459
Rep 2,002
Posts
Drives: 2011 E92 M3 DCT/ESS 625 kit
Join Date: Jan 2014
Location: Georgetown,ON
|
Quote:
__________________
"The Ultimate Driving Machine"
2011 E92 M3 supercharged ESS 625 2016 F15 X5 Msport 35i |
||
|
Appreciate
1
Russmov1328.00 |
| 01-08-2019, 08:21 PM | #166 | ||
|
Ultimate Driving Machine E92ESS625 M3/G05 X5 Msport 40i Individual
459
Rep 2,002
Posts
Drives: 2011 E92 M3 DCT/ESS 625 kit
Join Date: Jan 2014
Location: Georgetown,ON
|
Quote:
__________________
"The Ultimate Driving Machine"
2011 E92 M3 supercharged ESS 625 2016 F15 X5 Msport 35i |
||
|
Appreciate
0
|
| 01-08-2019, 08:43 PM | #167 | |||
|
Major
1328
Rep 1,343
Posts
Drives: 2015 BMW X5 xDrive 35i
Join Date: May 2018
Location: Ontario
|
Quote:
__________________
2015 BMW X5 xDrive 35i-Current
2016 BMW X4 xDrive 28i-Sold 2014 Lincoln MKX-Sold |
|||
|
Appreciate
0
|
| 01-08-2019, 08:47 PM | #168 | ||||
|
Ultimate Driving Machine E92ESS625 M3/G05 X5 Msport 40i Individual
459
Rep 2,002
Posts
Drives: 2011 E92 M3 DCT/ESS 625 kit
Join Date: Jan 2014
Location: Georgetown,ON
|
Quote:
__________________
"The Ultimate Driving Machine"
2011 E92 M3 supercharged ESS 625 2016 F15 X5 Msport 35i |
||||
|
Appreciate
1
Russmov1328.00 |
| 04-27-2019, 04:32 PM | #169 | |
|
Private First Class
 188
Rep 157
Posts |
Quote:
|
|
|
Appreciate
0
|
| 04-27-2019, 04:35 PM | #170 |
|
Private First Class
188
Rep 157
Posts |
I'm new here and I know it's been discussed, I realized the JL rear diffuser had difficulty with fitment, just curious about the RW front lip and rear diffuser. I'm going to be diy this project so I'm more likely to go OEM but just curious. Thanks guys!
|
|
Appreciate
0
|
| 05-14-2019, 12:46 AM | #171 | |
|
Private First Class
188
Rep 157
Posts |
Quote:
|
|
|
Appreciate
0
|
| 05-30-2019, 06:28 AM | #172 |
|
M Performance Class ;)
51
Rep 204
Posts |
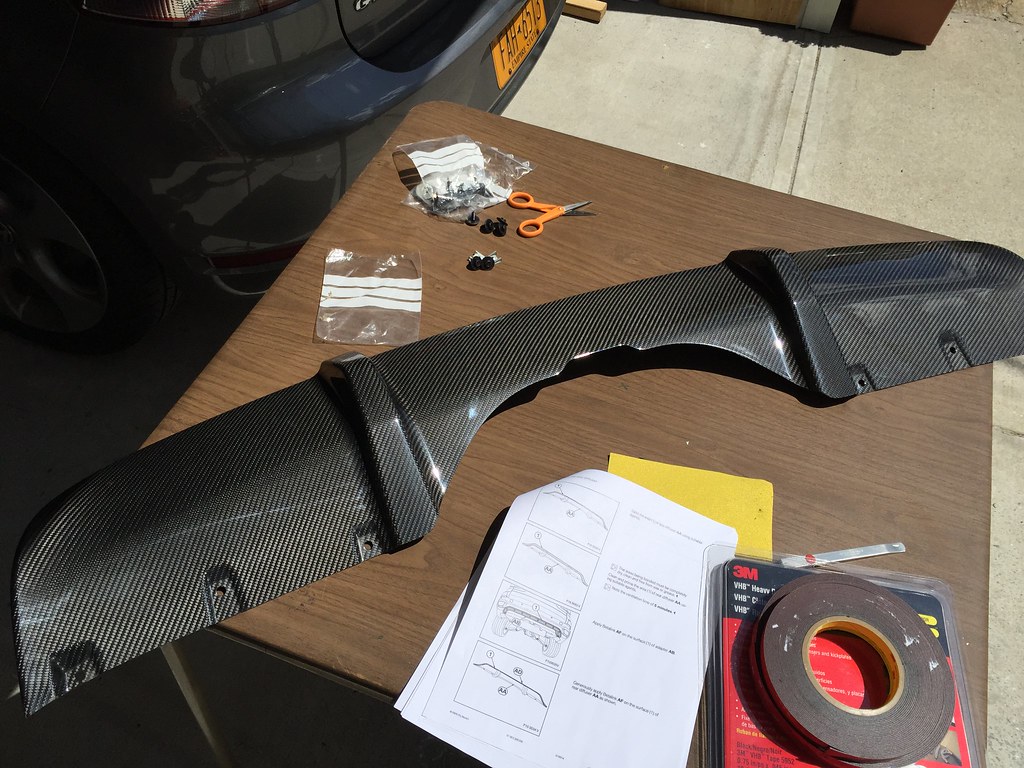
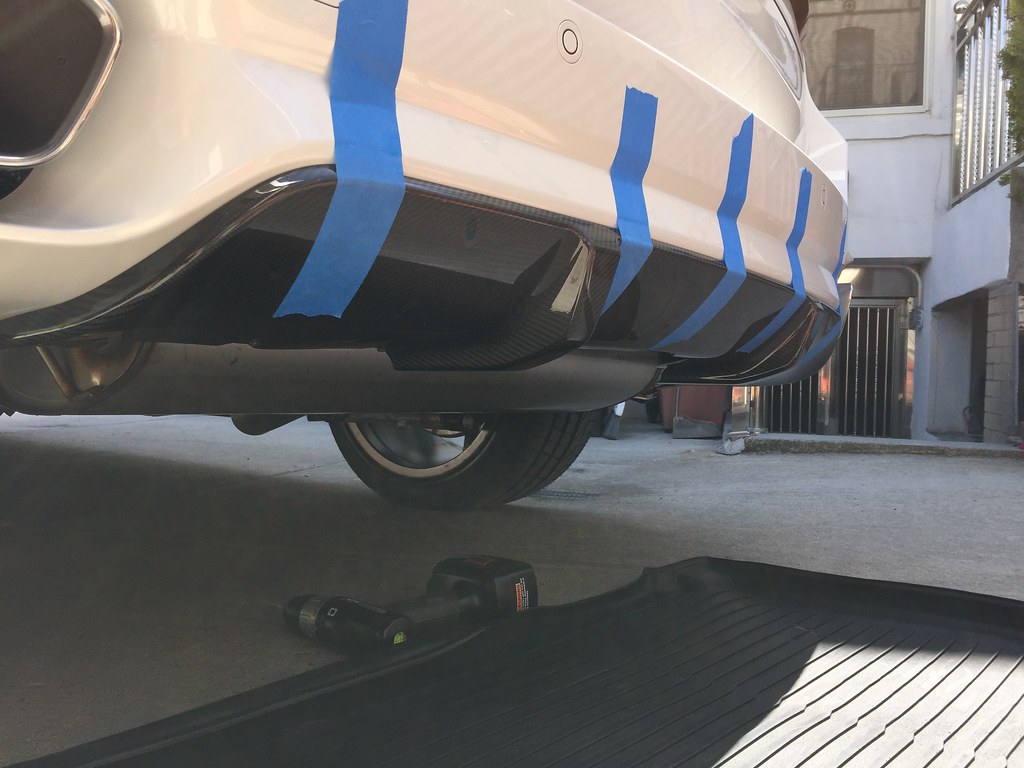
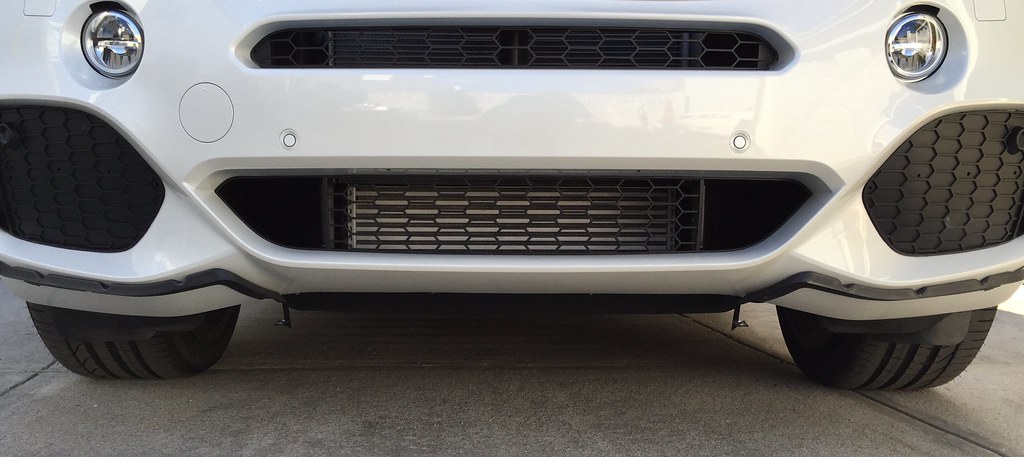
Just wanted to see how those with OEM lips VHP or 3M tape (no betalink)is holding up for the front lip/spoiler? I just received my OEM lip and debating betalink vs 3m Tape. How hard is the install to do myself? looks pretty straight forward based on the pictures and instructions.
|
|
Appreciate
0
|
| 05-30-2019, 07:20 AM | #173 | |
|
Major
1328
Rep 1,343
Posts
Drives: 2015 BMW X5 xDrive 35i
Join Date: May 2018
Location: Ontario
|
Quote:
__________________
2015 BMW X5 xDrive 35i-Current
2016 BMW X4 xDrive 28i-Sold 2014 Lincoln MKX-Sold |
|
|
Appreciate
0
|
| 05-30-2019, 07:28 AM | #174 | |
|
Captain
507
Rep 648
Posts
Drives: 2016 F15, 2015 F83
Join Date: May 2014
Location: RI
|
Quote:
|
|
|
Appreciate
0
|
| 05-30-2019, 08:11 AM | #175 | |
|
Second Lieutenant
354
Rep 296
Posts |
Quote:
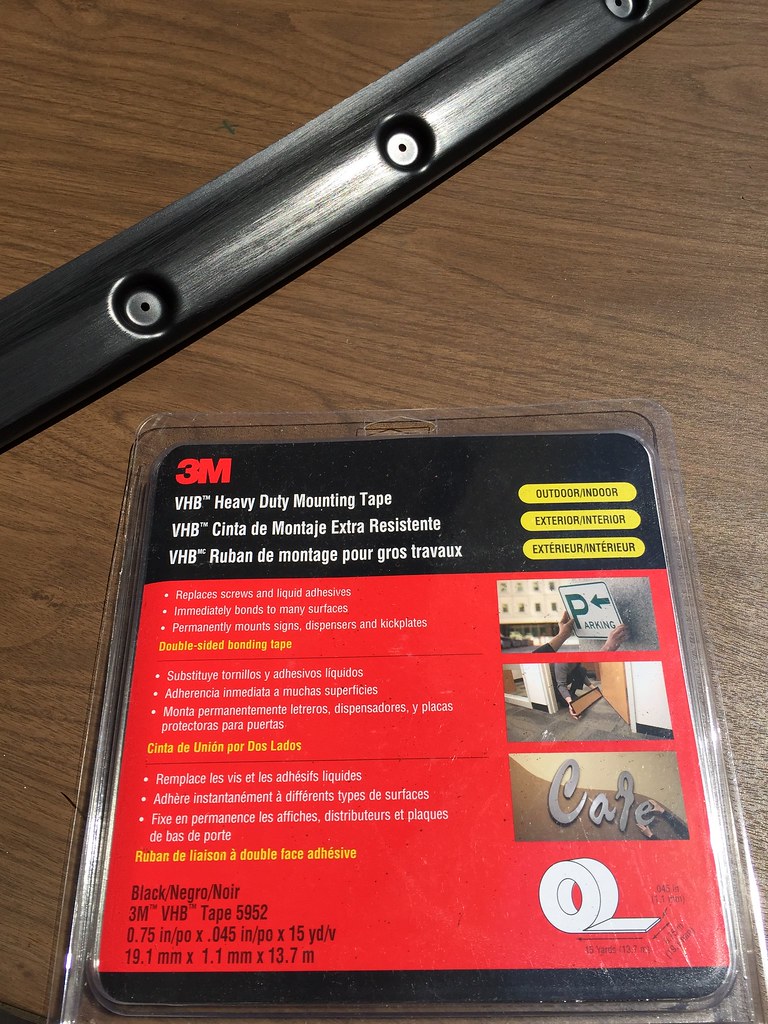
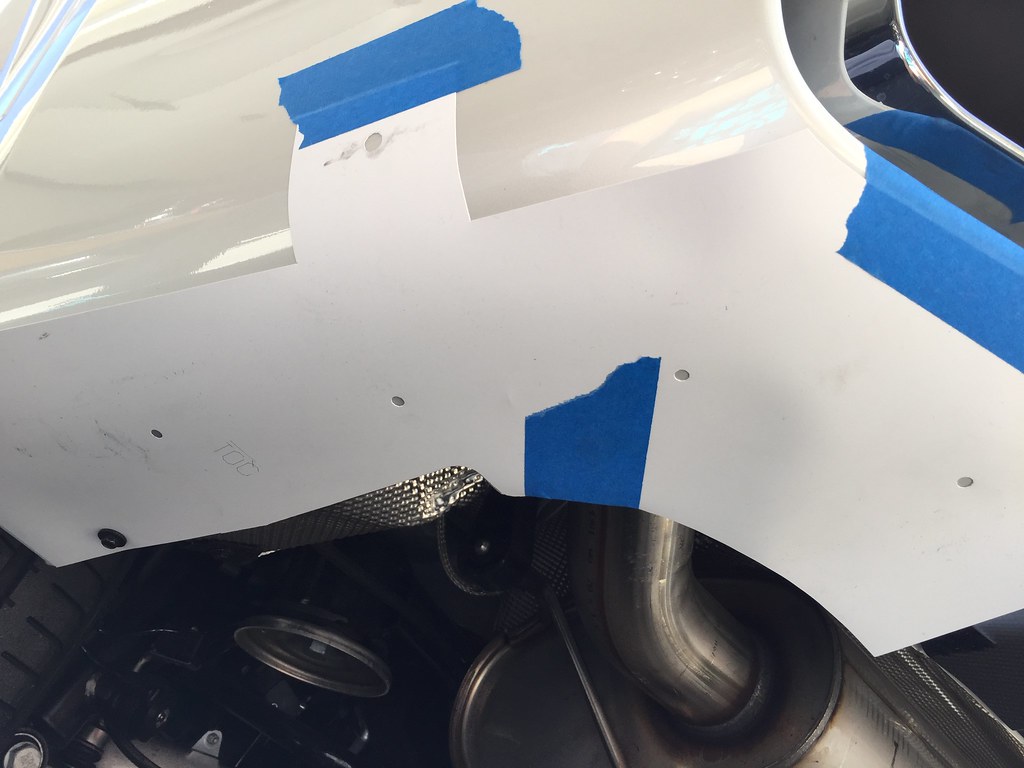
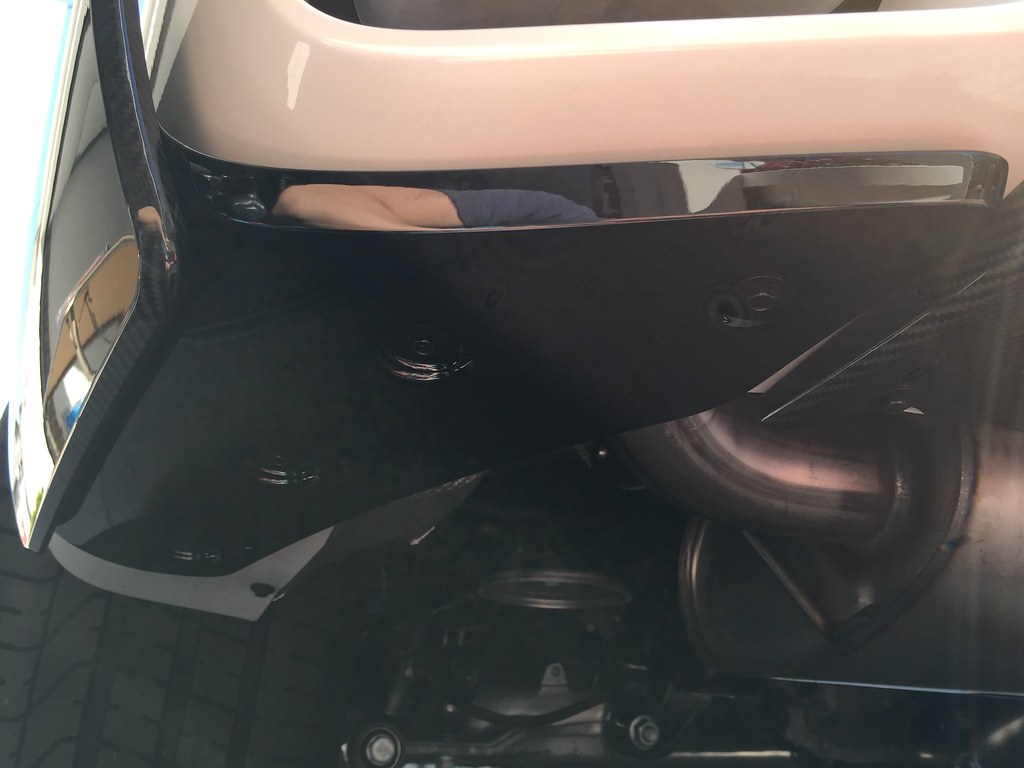
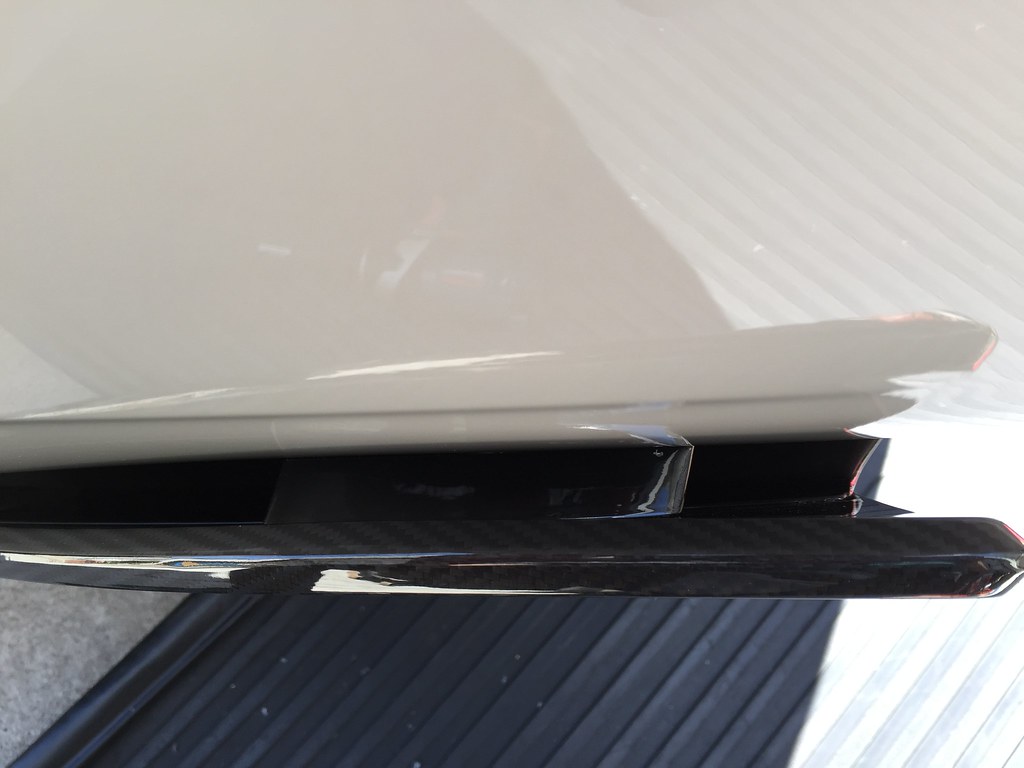
I know everyone mentions 3M VHB but I decided to go with 3M 06387 Auto Acrylic Plus Premium. According to 3m rep, this is the strongest auto tape they make and they recommend it over VHB. Unfortunately 06387 is hard to fine unless you buy bulk, but I was able to find a roll through the Internet. Pics below |
|
|
Appreciate
0
|
| 05-30-2019, 08:14 AM | #176 |
|
Major

535
Rep 1,011
Posts |
i did VHB and prepped really well. i do a good bit of highway driving and it just wasn't perfect. i'm a meticulous guy. i couldn't deal with the slight sags or it not being tight up against the body on the sides. did betalink and it allowed me to do it perfectly and sturdy as a steed. i know there are folks who say there's looks good with VHB but their standards may not be your own or perhaps it's just a matter of time, realistically. what you don't hear, are folks who did betalink and have had issues with separation or being unhappy with their decision other than the permanence of it.
__________________
2017 x5 w/MPPK & MPE build thread
http://f15.bimmerpost.com/forums/sho....php?t=1427846 |
|
Appreciate
0
|
Post Reply |
| Bookmarks |
|
|