|
||
 DIY - BMW M Performance Front Lip and Rear Diffuser Install
|
||
Post Reply |
|
|
Thread Tools | Search this Thread |
|
||
|
DIY - BMW M Performance Front Lip and Rear Diffuser Install
|
||
Post Reply |
|
|
Thread Tools | Search this Thread |
| 03-20-2016, 11:12 PM | #89 | |
|
Major
 
79
Rep 1,123
Posts
Drives: E39 540i, E90 320d,F15 30d
Join Date: Feb 2008
Location: Melbourne
|
Quote:
|
|
|
Appreciate
0
|
| 03-24-2016, 03:27 PM | #90 | |
|
Private
 22
Rep 63
Posts |
Quote:
__________________
2022 X6 40i M Sport
|
|
|
Appreciate
0
|
| 03-27-2016, 01:47 PM | #91 |
|
New Member

18
Rep 13
Posts |
For the guys using VHB to install the front lip, do you have a little flex and separation (just a little movement) towards the 2 inner peaks if you push down on the open middle section to simulate down force or is it solid all the time?
|
|
Appreciate
0
|
| 03-27-2016, 05:16 PM | #92 | |
|
Second Lieutenant
 92
Rep 208
Posts |
Quote:
and betalink(latter) the vhb I did notice that with pressure the lip did show some flexibility and could see a seam while applying pressure. I found the vhb extremely finicky. It took me no less than 4 times pulling the lip off and Re doing it to get it to my liking. Unfortunately after having work done on my bumper, the shop removed the lip that took me so long to get perfect and when they put it back on, it wasn't properly adhered and a month later after some spirited driving, I was dragging my lip on the asphalt. Needless to say, I replaced and now use betalink epoxy. Pros: Much more wiggle room when fitting to bumper vs vhb, rock solid bond. Cons: Can be messy if too much used, will be extremely difficult to remove if lip gets damaged, etc and u want to take off/replace. Just my 2¢ |
|
|
Appreciate
0
|
| 03-28-2016, 08:44 AM | #93 | |
|
Major General
 
5449
Rep 8,815
Posts |
Quote:
My main reason for not using betalink is exactly what you said. The way I see it, its only a matter a time before i damage the front or rear lip or someone else damage it for me so being able to remove it cleanly was my main concern. Its going to be nearly impossible to do with betalink and yes its very messy stuff. Alan
__________________
 |
|
|
Appreciate
0
|
| 03-28-2016, 09:33 AM | #94 |
|
Major General
3240
Rep 5,066
Posts |
My front lip with VHB installed also has a slight flex.. But so does my bumper when pressed hard enough. With the correct preparations the installation is pretty solid.
__________________
2015 F15 X5 35i Msport Space Grey M Performance parts MPPK, MPE
|
|
Appreciate
0
|
| 03-28-2016, 10:27 AM | #95 |
|
New Member
18
Rep 13
Posts |
Thanks for the additional info guys! I installed mine over the weekend with VHB and it all seemed solid with just a little play in the middle. I just wanted to make sure it wasn't just me. I guess only time will tell. I agree with you Alan that eventually it will get messed up and need to be replaced so rather then need to do a bunch of repairs to the bumper after trying to remove the betalink you can just replace the lip.
|
|
Appreciate
0
|
| 04-15-2016, 08:08 PM | #96 | |
|
Major

1070
Rep 1,170
Posts
Drives: 2024 X5 Comp BGM / Sahkir
Join Date: Aug 2012
Location: Los Angeles
|
Quote:
|
|
|
Appreciate
0
|
| 04-16-2016, 12:59 PM | #97 | |
|
General Nuisance in a Private Conveyance

77
Rep 1,907
Posts
Drives: like it's rented
Join Date: Nov 2008
Location: behind the wheel
|
Quote:
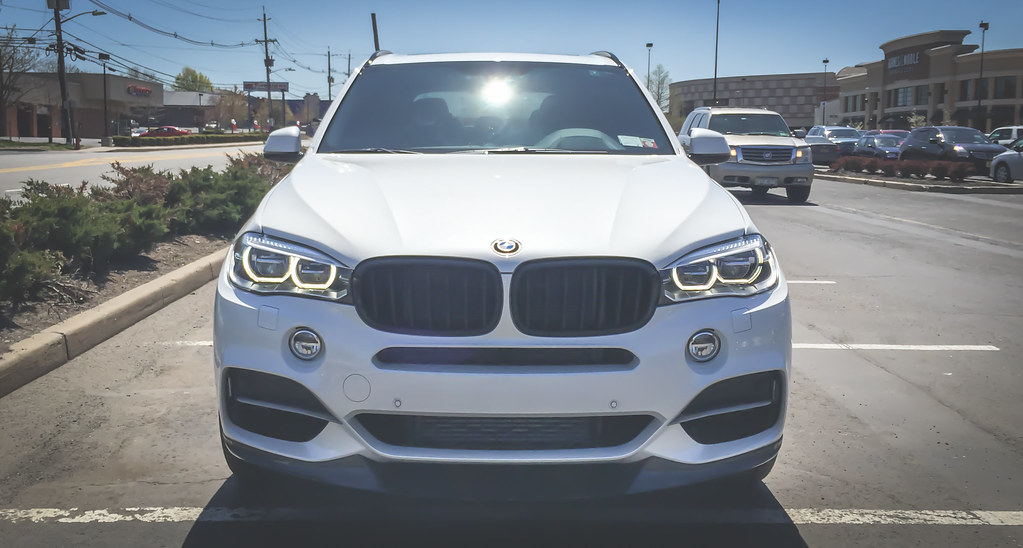
Thanks for all of the useful info! I want to do this to my X5 M-Sport, as well. I am new to the forum and looking to upgrade the look of my front end, including hole plugs since I don't have a need for the front plates, anymore, in Arizona. OBTW, where did you get those horizontal silver items (guide rods??) separating the blacked out intake vents? They look awesome and visually cuts the big black hole of the partially-functioning openings! An added plus to a great front lip!
__________________
 BMWCCA Member # 414198 |E90|SGM|6MT|Premium|Cold|Sport|Tint|LCI MSport Conversion|MTech|Blacklines|219M|PSS|Quaife|Helix FMIC|M3 Suspension|Megan Racing|GC Camber Plates/Coilovers|Eibach 440/800#|AR Catted DP|Cobb AP|StopTech Drilled/Slotted|SS Brake Lines|DWS Quaife Review: http://www.e90post.com/forums/showthread.php?t=311570 |
|
|
Appreciate
0
|
| 04-18-2016, 02:23 PM | #98 |
|
Major General
5449
Rep 8,815
Posts |
Contact Ben from this forum. RGsport.com
Those silver moldings are from a X5 M50D not sold here but Ben keeps them in stock. Alan
__________________
|
|
Appreciate
0
|
| 08-05-2016, 08:24 AM | #99 | ||
|
Enlisted Member
 10
Rep 34
Posts |
Quote:
|
||
|
Appreciate
0
|
| 11-24-2016, 08:49 PM | #101 | |
|
Ultimate Driving Machine E92ESS625 M3/G05 X5 Msport 40i Individual

459
Rep 2,002
Posts
Drives: 2011 E92 M3 DCT/ESS 625 kit
Join Date: Jan 2014
Location: Georgetown,ON
|
Quote:
__________________
"The Ultimate Driving Machine"
2011 E92 M3 supercharged ESS 625 2016 F15 X5 Msport 35i |
|
|
Appreciate
0
|
| 03-16-2017, 10:30 AM | #102 |
|
Captain
507
Rep 648
Posts
Drives: 2016 F15, 2015 F83
Join Date: May 2014
Location: RI
|
For all you guys who used VHP to install the front splitter, how is it holding up after a couple winters? I've seen pictures of the splitter completely impacted with snow/slush and was wondering if the flex mentioned earlier became an issue?
Did anyone consider using betalink to install the brackets and then VHP for the splitter itself? Would that make it easier to remove in the future (of needed) or is it just a waste of time?
__________________
2016 F15 X5 50i M-Sport
2015 F83 M4 |
|
Appreciate
0
|
| 03-16-2017, 11:05 AM | #103 | |
|
Major General
5449
Rep 8,815
Posts |
Quote:
The questionable area is where the spoiler meets the bracket. People really do need to sand and wipe down the bracket/spoiler before adding the 3M tape there. Sanding is critical for the tape to adhere to the Carbon and smooth plastic. What you could do is add a very thin bead of betalink on the edge of the bracket (side closer to the ground) while using 3M VHB tape on the upper section if you want it to be extra secure but not end up using a ton of betalink making it super messy and impossible to remove. This would minimize any 'oozing' of betalink when you push the spoiler up against the bracket since you only have a small thin bead of it on the lower section. |
|
|
Appreciate
0
|
| 03-21-2017, 05:39 PM | #105 | |
|
Enlisted Member
8
Rep 32
Posts |
Quote:
|
|
|
Appreciate
0
|
| 03-22-2017, 09:15 AM | #106 |
|
Major General
5449
Rep 8,815
Posts |
I wouldn't suggest it. The area where the brackets attaches to existing holes is only used for positioning. Once its positioned correctly you break off the tabs that mounts to the existing holes on the body. That means if you don't drill you are relying only on the tape to hold everything together. Personally i wouldn't trust it.
For the rear its the same deal and you can't really secure the bracket to the bumper with just tape due to the under side of the bracket being recessed. Its not a flat surface so you have very minimal contact points to the bumper if you don't drill.
__________________
|
|
Appreciate
0
|
| 03-22-2017, 02:44 PM | #107 | |
|
Enlisted Member
8
Rep 32
Posts |
Quote:
|
|
|
Appreciate
0
|
| 03-22-2017, 03:22 PM | #109 | |
|
Major General
3240
Rep 5,066
Posts |
Quote:
__________________
2015 F15 X5 35i Msport Space Grey M Performance parts MPPK, MPE
|
|
|
Appreciate
0
|
| 03-22-2017, 10:02 PM | #110 | ||
|
Enlisted Member
8
Rep 32
Posts |
Quote:
 |
||
|
Appreciate
0
|
Post Reply |
| Bookmarks |
|
|