| 04-24-2015, 04:56 PM | #1 |

1763
Rep 7,650
Posts |
IND | F85 X5M/F86 X6M Painted Fender Trim DIY
In continuation of supplanting the BMW chrome accents, one of the other areas require attention is the F85/F86 fender trim. As BMW changed the body lines from the E70/E71, they altered the shape of the fender trim from a single line to more of a boomerang shape. Unfortunately, for owners that want a more aggressive appearance, this piece is much larger than the previous generation.
We will be producing two DIYs for this piece with this being the first and least invasive installation. The F85/F86 X5M/X6M fender trim is secured via four plastic tabs. From the factory these plastic tabs are melted from behind the fender. Removing these pieces is easy as they do not require significant force, but installation presents us with two options. Tools required:
Available for purchase on our website or through an IND representative http://ind-distribution.com/ind/cate...ide-grille-set Step 1: The first step in this process is to protect your vehicles beautiful finish. Outline the fender trim with painters tape. Take extra care to make sure you apply tape in the front crevice of the fender trim. Step 2: With the fender trim lined with painters tape, use a flexible bondo spreader or other plastic trim tool to begin the process of loosening the trim. As you can see in the below images, our technician does this from the inside edge and works from the top to the bottom. Step 3: After using the prytool to loosen the fender trim, you can use your hands to apply more leverage and pull the fender trim out of the vehicle. Step 4: Remove the painters tape and clean the area with a little quick detailer. Step 5: This is where our DIY takes the least invasive route. We will offer the option of pre-installing double-sided tape, but for the purpose of this DIY lets make step 5 about the application of the tape on the fender trim. As you notice from the below image, we applied 6 pieces of double-sided tape. If you elect to do this on your own, then we recommend using this pattern. Step 6: Remove the backing from the 3M tape on the fender trim Step 7: Using the guide holes on the body and plastic tabs on the fender trim, insert the fender trim into the fender. Apply pressure along the areas where there is double-sided tape. Step 8: Admire your work. The second option for DIY will be more detailed and show individuals how to properly melt the tabs on the inside of the fender. This is for a 100% factory correct installation. It is worth noting that the double-sided tape installation has held strong for over a week and we expect this to last. For those interested in the factory installation, stay tuned. 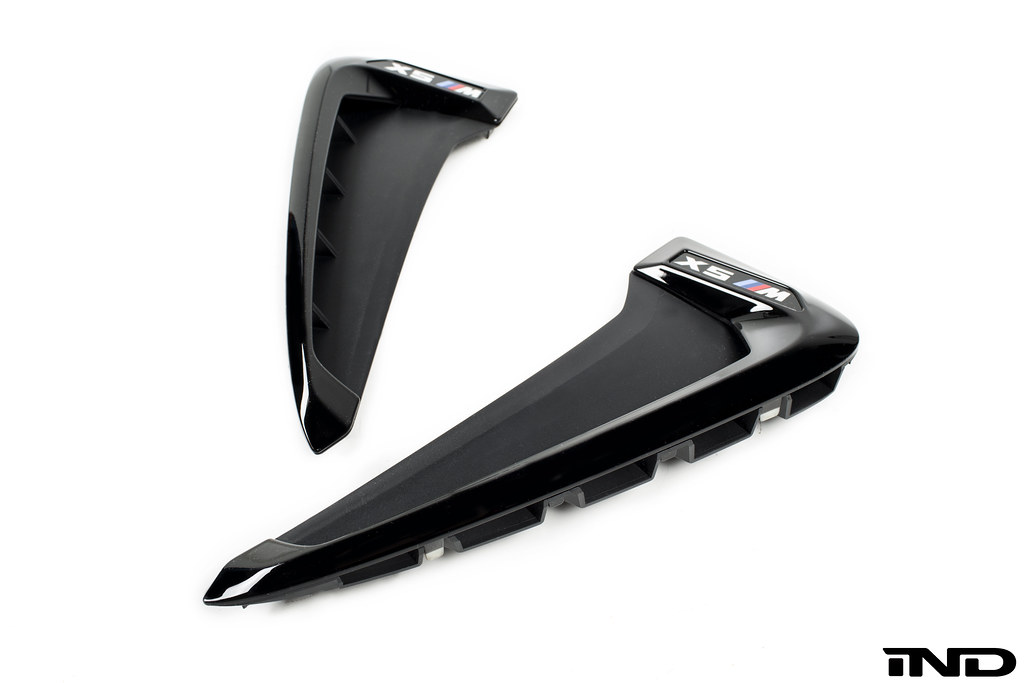 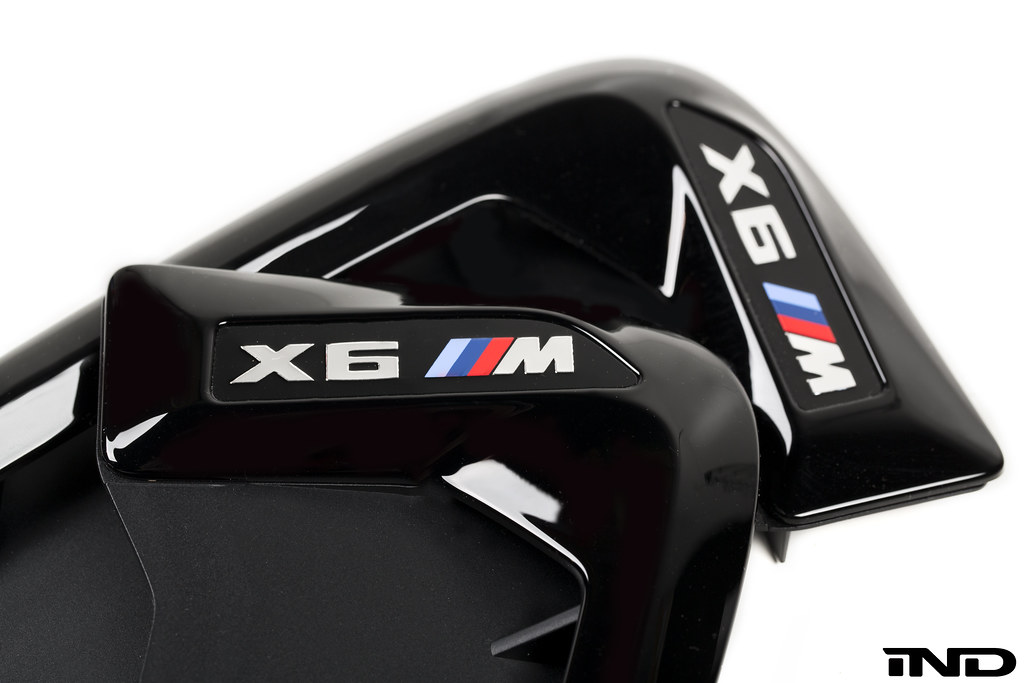 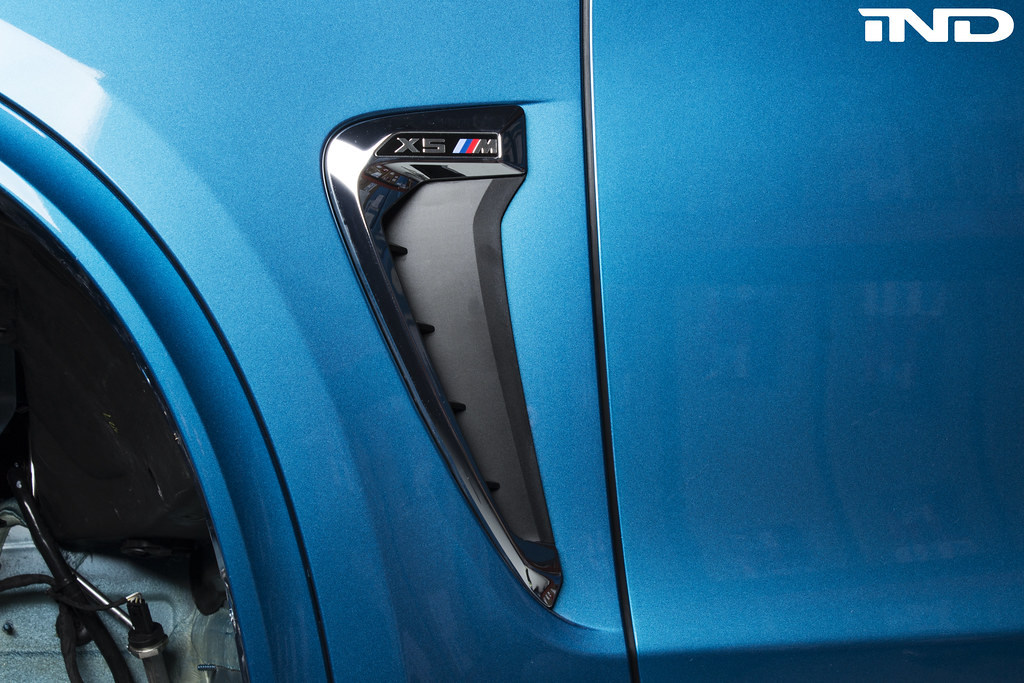 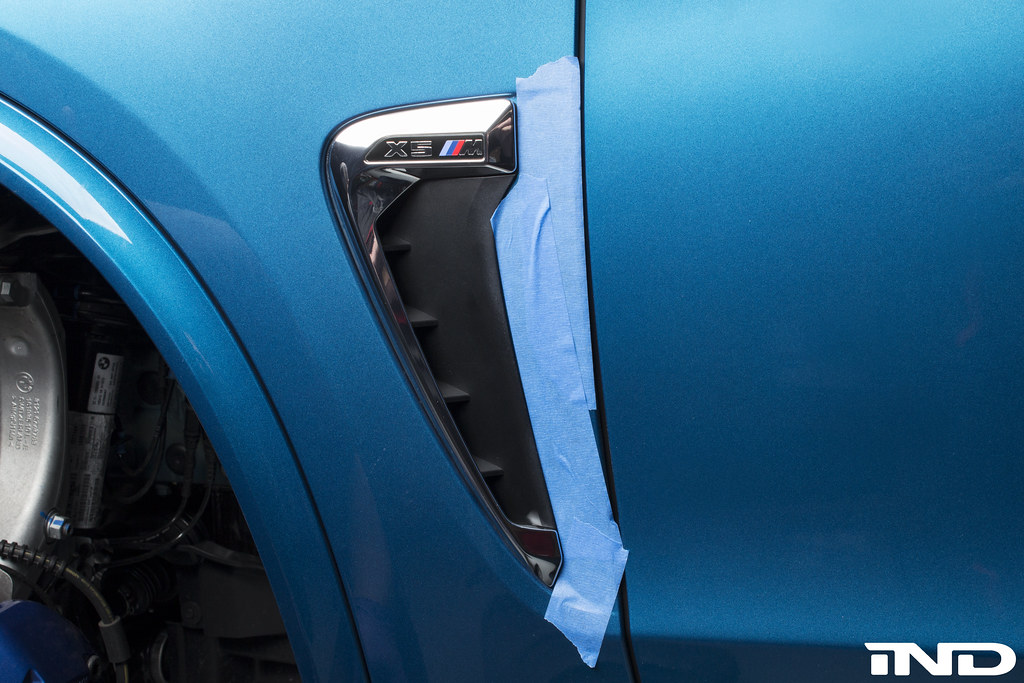 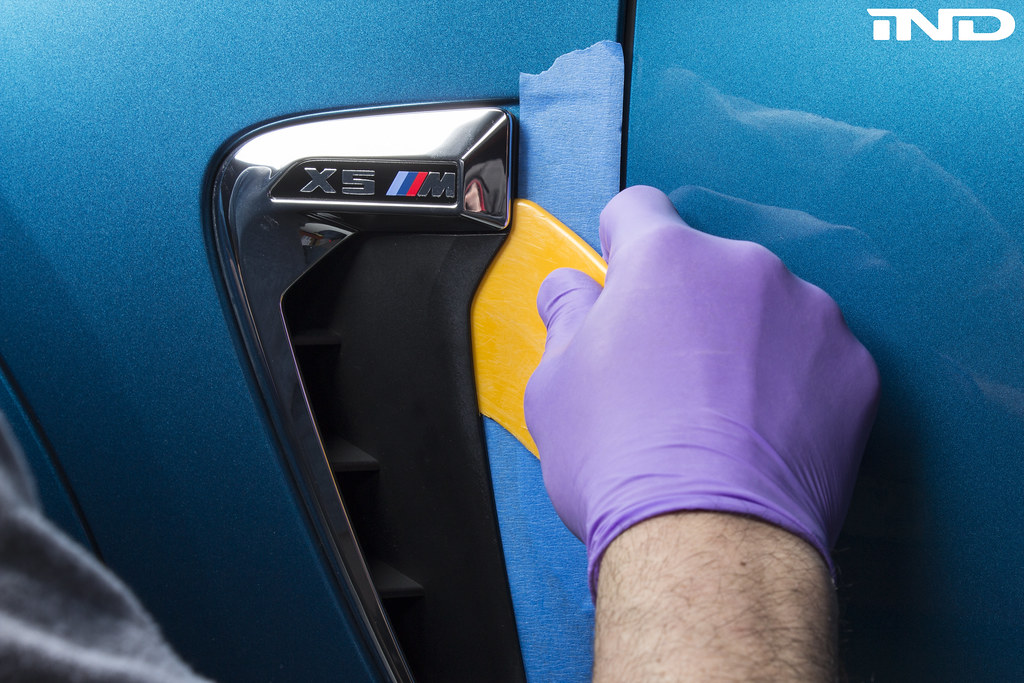 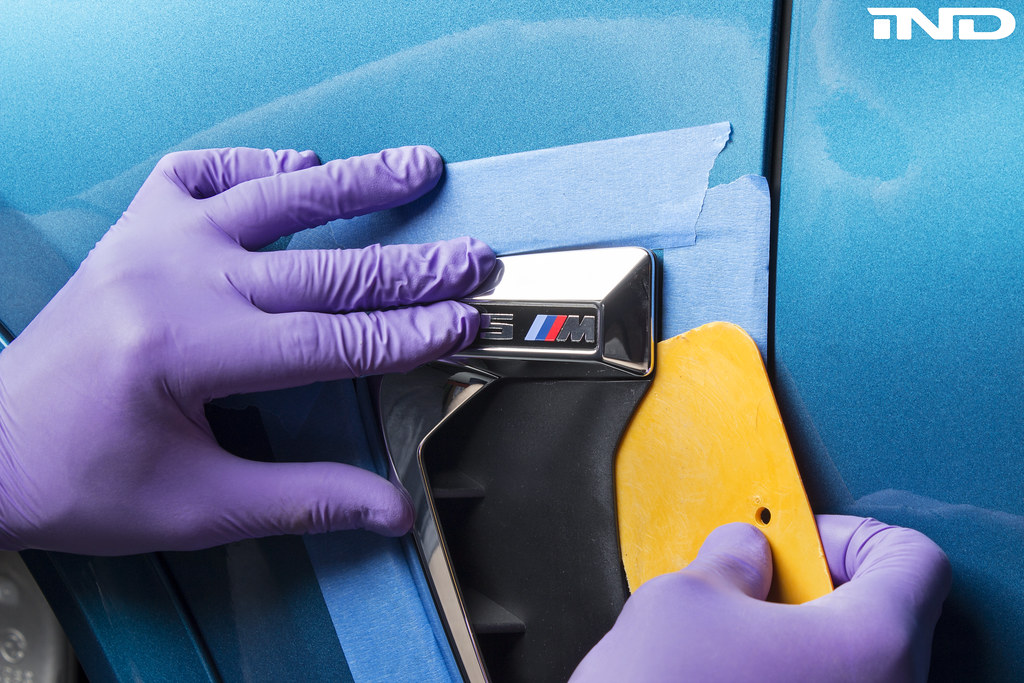  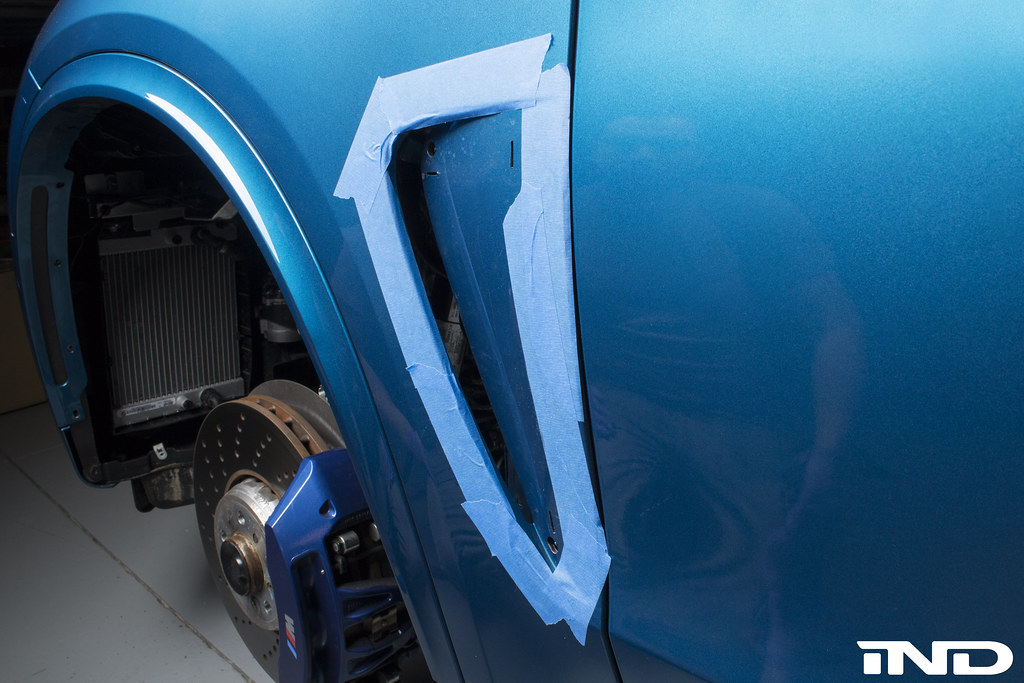 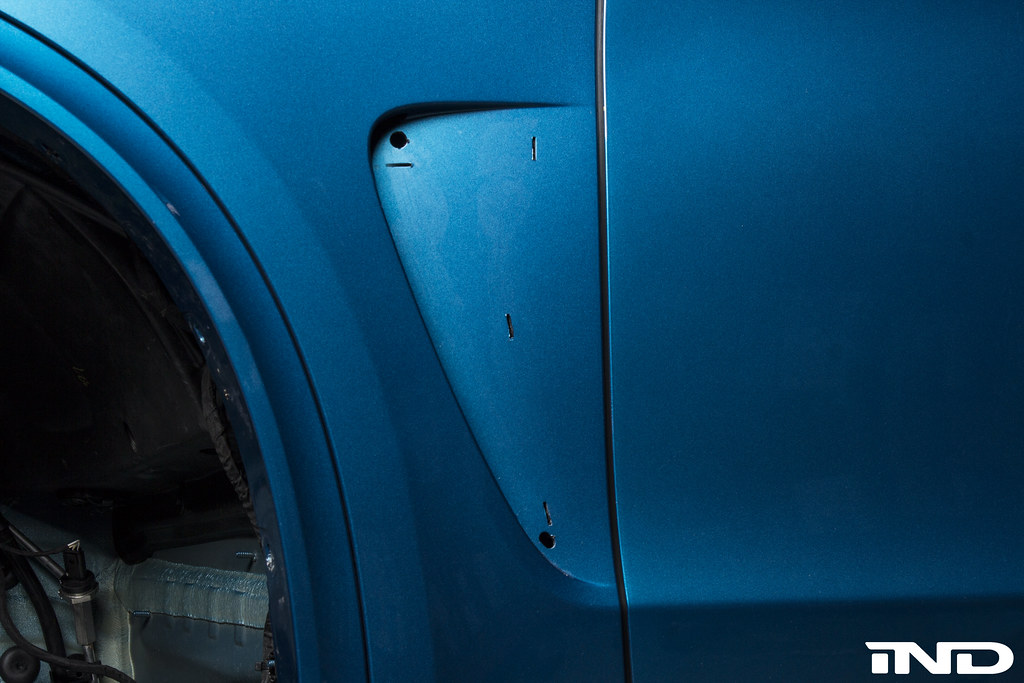 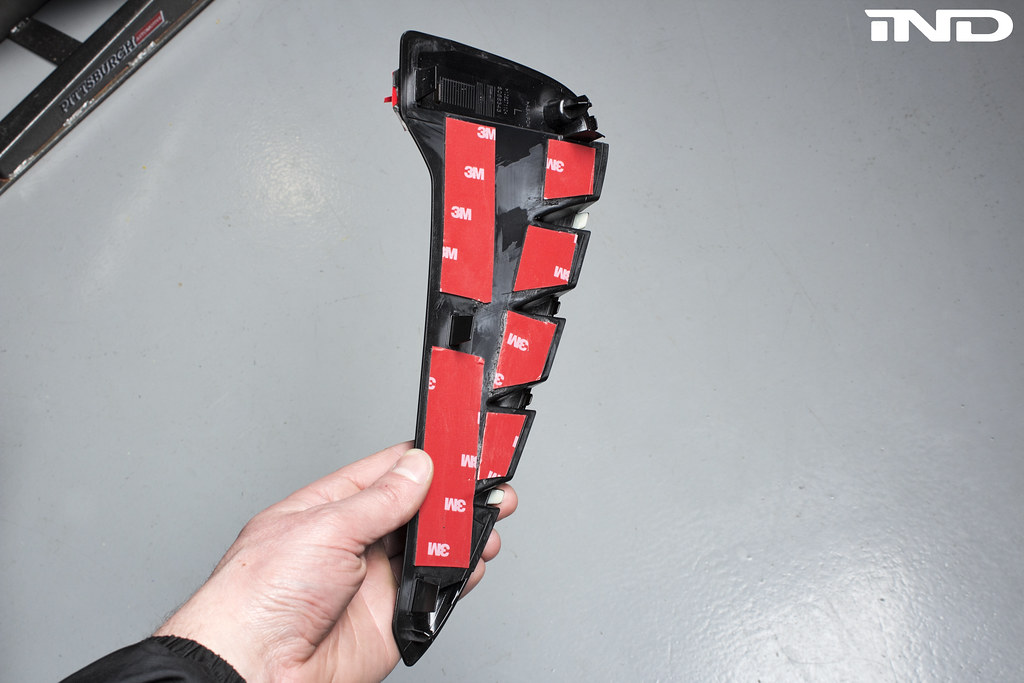 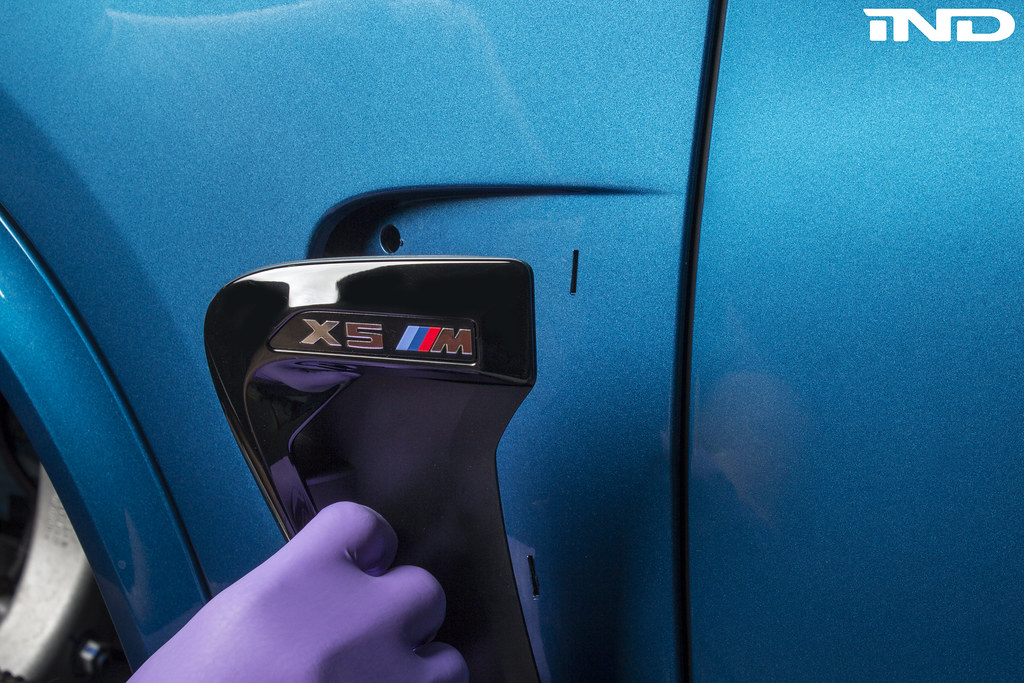 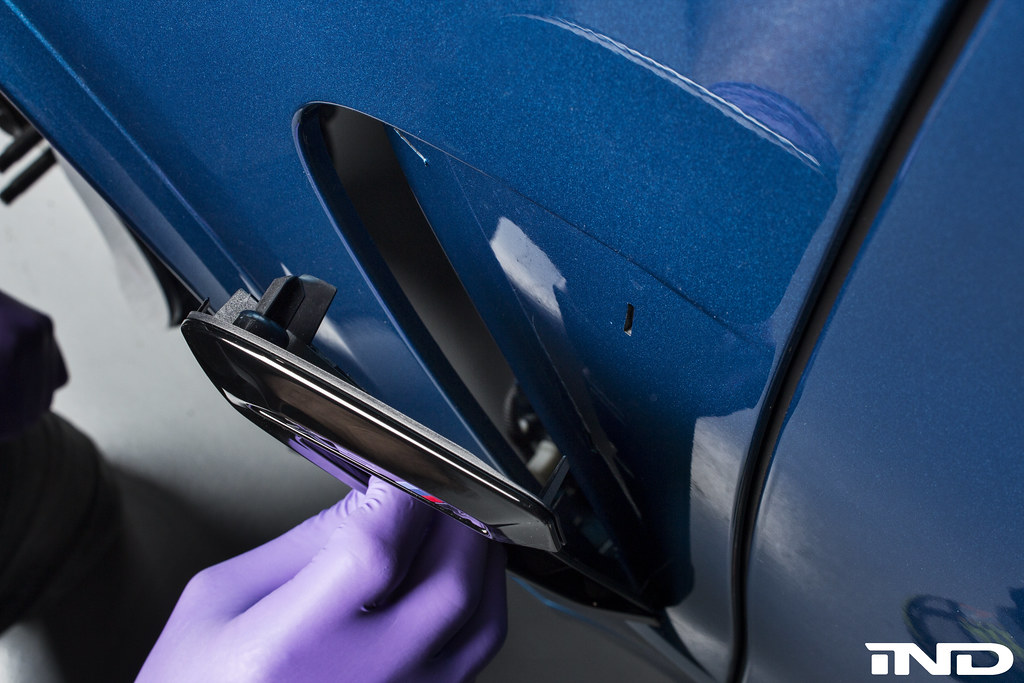 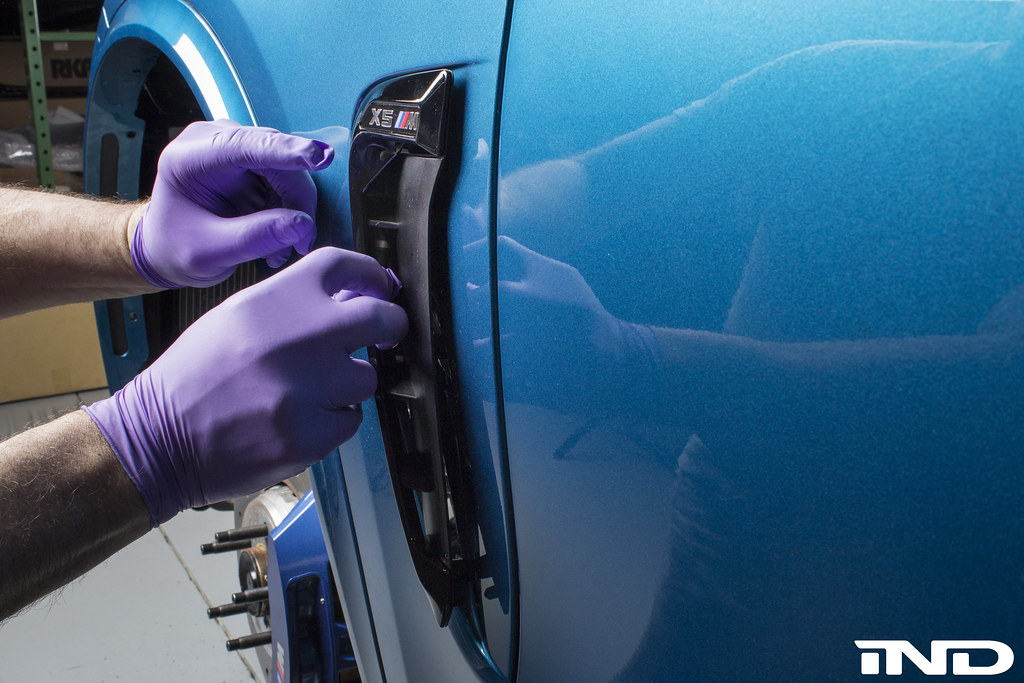  
__________________
|
| 09-19-2015, 05:58 PM | #2 |
|
Second Lieutenant
 188
Rep 247
Posts |
Great DIY guys - the factory method *sucks* and isn't as secure. I just did mine the way you posted and it worked like a charm. Ended up more secure than the factory chrome pieces were.
As always, well done! |
|
Appreciate
1
|
| 09-23-2015, 06:38 PM | #3 |
|
BMW CCA #505303

43
Rep 185
Posts |
I like this, it looks like it makes the part 'tighter' to the car vs. the factory fit in which it looks almost like it's just 'slightly' lose.
__________________
2015 BMW X5M F85 ///M
|
|
Appreciate
0
|
| 09-24-2015, 07:59 AM | #4 |
|
Brigadier General

1381
Rep 3,834
Posts |
For those who are doing this themselves, use 3M Outdoor Double Sided Tape. I mounted deck lip spoiler with it and it lasted years. When it comes time to remove it, it's nearly impossible without using the floss technique. Don't cheap out on tape.

__________________
Daily: G12 750 MSPORT Weekend Car: E90 M3
|
|
Appreciate
0
|
| 12-01-2015, 09:18 AM | #7 | |
|
General
12905
Rep 18,679
Posts |
Quote:
 I've sold a few to F15 X5 owners.
__________________
Email:sales@rgsport.com | IG:RGSport_USA | Web:RGSportShop.com SPRING Sale!! 04/01 - 04/15 - Code: "SPRING2024" MSS iSweep RaceChip Sterckenn AutoTecknic Akrapovic Vossen Wheels Eventuri Active Autowerke KW H&R Ohlins Remus and more... |
|
|
Appreciate
0
|
| 12-01-2015, 10:35 AM | #8 |
|
Captain
166
Rep 710
Posts |
I wish these came without model designation. Instead of having that little cutout with the model text, just keep it flat.
__________________
Cars: 2016 BMW X5M. 2017 BMW X1.
Bikes: 2007 BMW F650GS. 2014 BMW K1600GTL Exclusive. 2014 BMW HP4 Competition. 2016 BMW K1300S. |
|
Appreciate
0
|
| 12-01-2015, 11:29 AM | #9 | |
|
Private
 42
Rep 92
Posts
Drives: 2023 X5M Comp
Join Date: Nov 2015
Location: Seattle, WA, USA
|
Quote:
__________________
2023 X5 ///M Comp - Marina Bay Blue on Sakhir Orange with DA | EX | BW
past: '20 X3MC - Toranto Red | '17 S8 - Matte Silver | '16 X5M - LBB | '14 SQ5 - Estoril | '13 S4 - Glacier | '12 S4 - Ibis | '09 GTI - White | '01 S4 (Stg 3) - Laser | '01 A4 (1.8T) - Santorin | '97 Jetta GT - Black | '94 Integra EX - White |
|
|
Appreciate
0
|
| 12-01-2015, 12:28 PM | #10 | ||
|
General
12905
Rep 18,679
Posts |
Quote:
My vendor is in the work on the blank one, but still have the indentation.
__________________
Email:sales@rgsport.com | IG:RGSport_USA | Web:RGSportShop.com SPRING Sale!! 04/01 - 04/15 - Code: "SPRING2024" MSS iSweep RaceChip Sterckenn AutoTecknic Akrapovic Vossen Wheels Eventuri Active Autowerke KW H&R Ohlins Remus and more... |
||
|
Appreciate
0
|
| 12-01-2015, 01:27 PM | #11 |
|
Captain
166
Rep 710
Posts |
The indentation is what I was worried about. Thanks for the info!
__________________
Cars: 2016 BMW X5M. 2017 BMW X1.
Bikes: 2007 BMW F650GS. 2014 BMW K1600GTL Exclusive. 2014 BMW HP4 Competition. 2016 BMW K1300S. |
|
Appreciate
0
|
| 12-01-2015, 04:07 PM | #13 | |
|
General
12905
Rep 18,679
Posts |
Quote:
__________________
Email:sales@rgsport.com | IG:RGSport_USA | Web:RGSportShop.com SPRING Sale!! 04/01 - 04/15 - Code: "SPRING2024" MSS iSweep RaceChip Sterckenn AutoTecknic Akrapovic Vossen Wheels Eventuri Active Autowerke KW H&R Ohlins Remus and more... |
|
|
Appreciate
0
|
| 12-01-2015, 04:08 PM | #14 | |
|
General
12905
Rep 18,679
Posts |
Quote:
__________________
Email:sales@rgsport.com | IG:RGSport_USA | Web:RGSportShop.com SPRING Sale!! 04/01 - 04/15 - Code: "SPRING2024" MSS iSweep RaceChip Sterckenn AutoTecknic Akrapovic Vossen Wheels Eventuri Active Autowerke KW H&R Ohlins Remus and more... |
|
|
Appreciate
0
|
| 12-01-2015, 04:10 PM | #15 | |
|
Private
60
Rep 89
Posts |
Quote:
") ............ ............I'll hold you to your word... lol |
|
|
Appreciate
0
|
| 12-01-2015, 04:15 PM | #16 | ||
|
General
12905
Rep 18,679
Posts |
Quote:
Installation on regular X5 is easier since you don't need to remove the old one. Here is the picture of the sample on my car.
__________________
Email:sales@rgsport.com | IG:RGSport_USA | Web:RGSportShop.com SPRING Sale!! 04/01 - 04/15 - Code: "SPRING2024" MSS iSweep RaceChip Sterckenn AutoTecknic Akrapovic Vossen Wheels Eventuri Active Autowerke KW H&R Ohlins Remus and more... |
||
|
Appreciate
0
|
| 12-02-2015, 10:19 PM | #17 | |
|
Private
60
Rep 89
Posts |
Quote:
P.S. How did you get HRE to use your car as the model? I really want to do that  |
|
|
Appreciate
0
|
| 12-02-2015, 10:21 PM | #18 | ||
|
General
12905
Rep 18,679
Posts |
Quote:
That's one of the benefits for being in the industry. PS: Sorry for hi-jacking your post Ryan.
__________________
Email:sales@rgsport.com | IG:RGSport_USA | Web:RGSportShop.com SPRING Sale!! 04/01 - 04/15 - Code: "SPRING2024" MSS iSweep RaceChip Sterckenn AutoTecknic Akrapovic Vossen Wheels Eventuri Active Autowerke KW H&R Ohlins Remus and more... |
||
|
Appreciate
0
|
| 02-07-2016, 07:46 AM | #19 |
|
Lieutenant
118
Rep 455
Posts |
I did this install over the weekend and figured I'd post a few notes that might help anyone attempting this in the future. First off, the parts were exactly as advertised, top quality, and packed for shipping. Great product.
Install wasn't too bad (certainly not as tough as the front grilles or painted reflectors!). Definitely mask up the entire area around the grilles well, even getting the tape under the piece when feasible. Since the OEM pieces are NOT taped in place, but only held in by plastic tabs, you'll be able to floss the masking tape behind the original side grille. Double up on tape layers just to be safe. I found removing the side grilles was easiest by starting on the inside of the wheel well, actually. I already had the wheel off since I was doing the painted reflector, and you have total access to the side grille from the inside of the wheel arch. This way, I started to pry from behind the original OEM piece instead of working from the outside in, and this allowed me to loosed the piece a little bit. Between that and then applying pressure with my hands, grasping the OEM piece from the front, I was gradually able to loosen the OEM piece. I only used the above mentioned bondo spreader (I actually used a set of plastic trim removal tools, as well as vinyl wrap spreaders) a little bit. The OEM tabs are either pressure fit or bent over in place. So you will have to break them, so don't be alarmed. It's easy to do, just be methodical and patient. One side grille came off in a single pull, the other gave way a couple tabs at a time. You'll likely then need to push the broken bits of the tabs in as there's no way to remove them. I intended to order my side grilles with double sided tape pre-installed, but forgot to do so. So order some up or be specific. Once the OEM piece and masking is removed, clean the area as described, and then install is super easy. The tape will MORE than hold this tiny trim piece, and that's why I imagine the other install technique mentioned above isn't outlined anywhere. Double sided tape is strong as hell, and will more than hold this piece. In short, a pretty easy install. Just be careful to the paint, and patient. HTH - Jon |
|
Appreciate
1
Mgarage66.50 |
| 03-20-2016, 01:46 PM | #20 |
|
First Lieutenant
182
Rep 321
Posts |
I just removed my Side Grills. It took about 10 minutes to tape, 5 minutes to remove the driver side and 2 minutes to remove the passenger side.
I decided to park the X5 outside for hours in freezing cold temperature. Bringing the vehicle back in to warmth and giving the passenger side a one, two, three pull straight out but at a slight angle to the back of the vehicle, all tabs broke quickly. The driver side did not want to come off that easily. Using the bondo spreader, it was as IND described. Try to break the top tab first, then work the spreader down the grill to the next tab, and try to break that one. Bottom tab was the strongest but easier to get at now that the whole piece was lose. Bye Bye Chrome |
|
Appreciate
0
|
| 04-12-2017, 07:59 PM | #21 |
|
Colonel

183
Rep 2,245
Posts
Drives: '16 991.1 911 GTS, '16 F85 X5M
Join Date: Apr 2012
Location: NNJ
|
So if u break the clips on the chrome vents, are they reuseable? Do you just reinstall them with tape when you return to OEM?
And has anyone removed the side vents with the tape? How difficult is it? |
|
Appreciate
0
|
| 04-12-2017, 08:15 PM | #22 | |
|
General
12905
Rep 18,679
Posts |
Quote:
Removing the tape after sometime may be a little challenging, but no heat gun can't do to soften up that double sided tape.
__________________
Email:sales@rgsport.com | IG:RGSport_USA | Web:RGSportShop.com SPRING Sale!! 04/01 - 04/15 - Code: "SPRING2024" MSS iSweep RaceChip Sterckenn AutoTecknic Akrapovic Vossen Wheels Eventuri Active Autowerke KW H&R Ohlins Remus and more... |
|
|
Appreciate
0
|
Post Reply |
| Bookmarks |
| Thread Tools | Search this Thread |
|
|


