| 11-24-2015, 03:34 PM | #1 |

1847
Rep 7,634
Posts |
IND| F85 X5M / F86 X6M M Performance Carbon Center Console DIY
The interior on the new F85/F86 embodies a far more modern and sophisticated presence over past generations. One area lacking the modern new look was the center console trim. This piece from the factory comes in a black leather accented with aluminum trim. The M Performance part features a 2x2 twill weave to match that of the other carbon trim if you optioned that on your vehicle.
Tools Required: • Torx T20 bit • Painters tape (optional) • Interior pry tool (optional) Item is available on our website for purchase: https://ind-distribution.com/product?sku=51162405292 Step 1: The first step in the process is to remove the factory console. I recommend opening the center console to gain better access to the old console. There are four tabs that need to be released. First lightly pull up on edge closest to the cup holder. This will release the front two tabs. Step 2: Carefully work your way back to release the two back tabs. Step 3: Unhook the royal blue connectors from the MDrive controller and iDrive controller. These will transfer over to your new carbon center console. Step 4: The MDrive controller is held in via two clips, simply release the top and bottom black clips to remove. Step 5: The iDrive controller is secured by three T20 Torx screws. Remove and put the bolts to the side you will need these for the new console. Step 6: Install the MDrive controller into the new carbon console from the front ensuring the new clips click in. Place the iDrive controller in place from the back and reinstall the three torx bits. Be careful not to overtighten these. Step 7: Reinstall both royal blue connectors into the correct controllers. Step 8: Carefully place the center console back into position and start from the back to press the clips back into place. Step 9 Wipe down your new console then sit back and admire your hard work  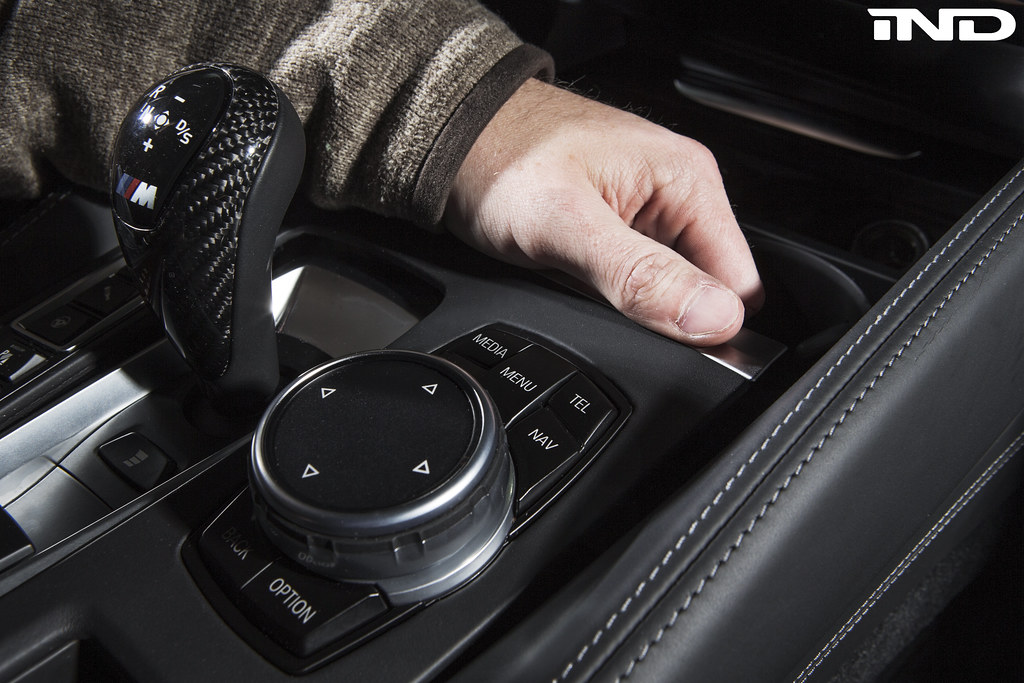 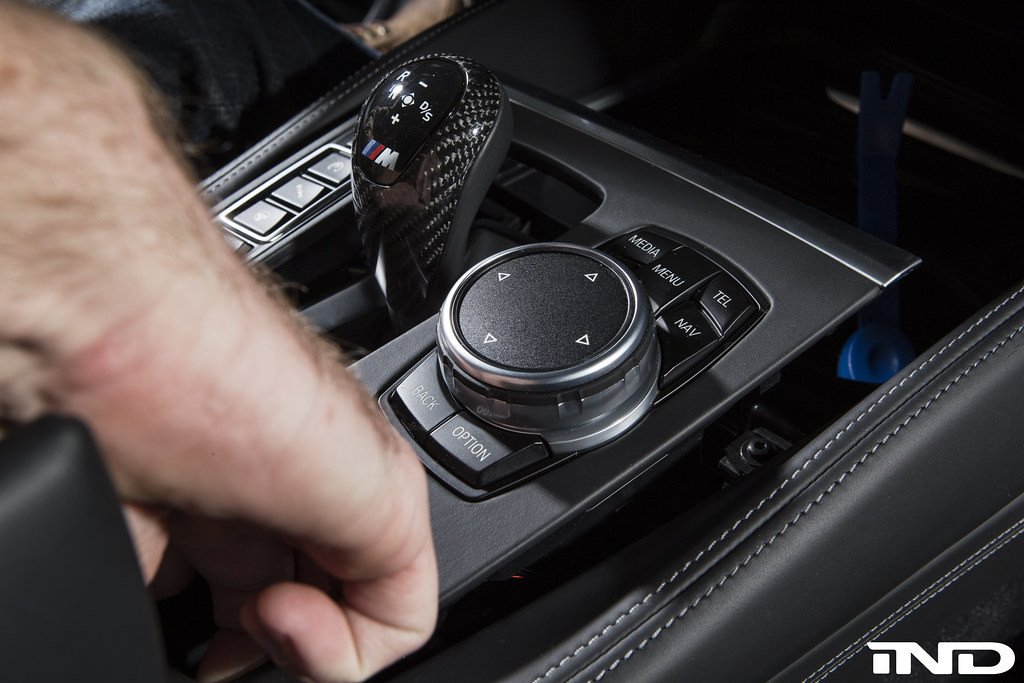 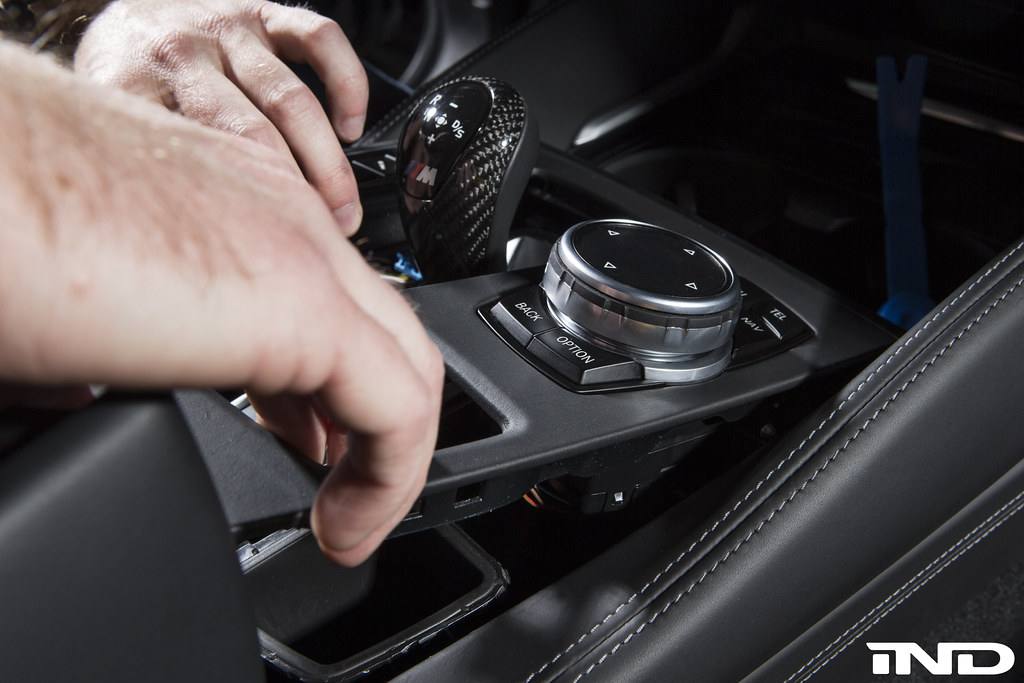 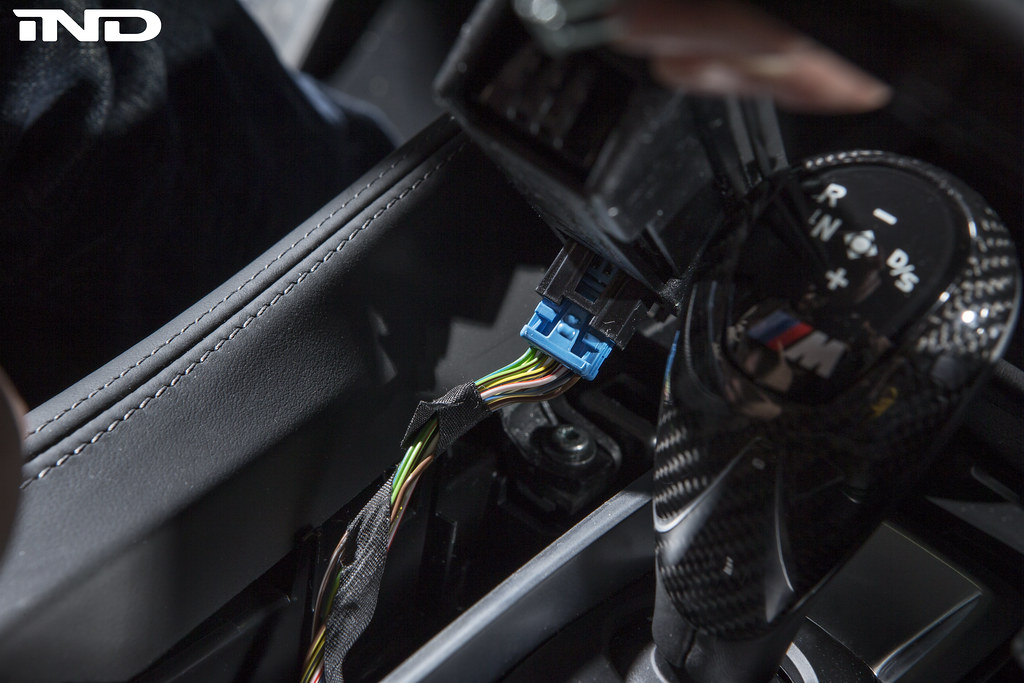 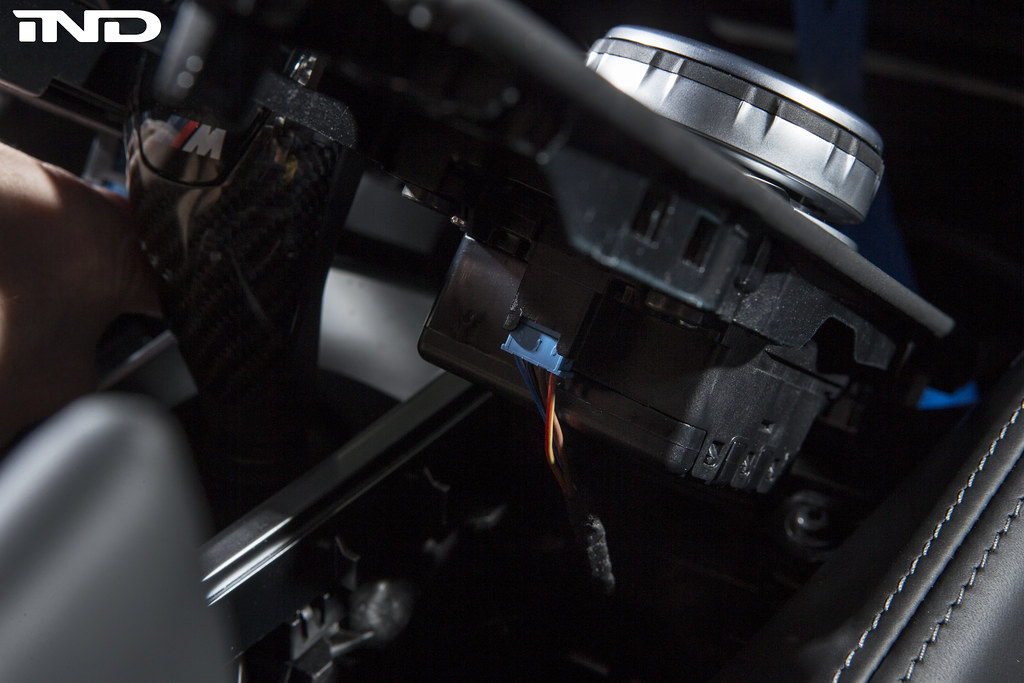 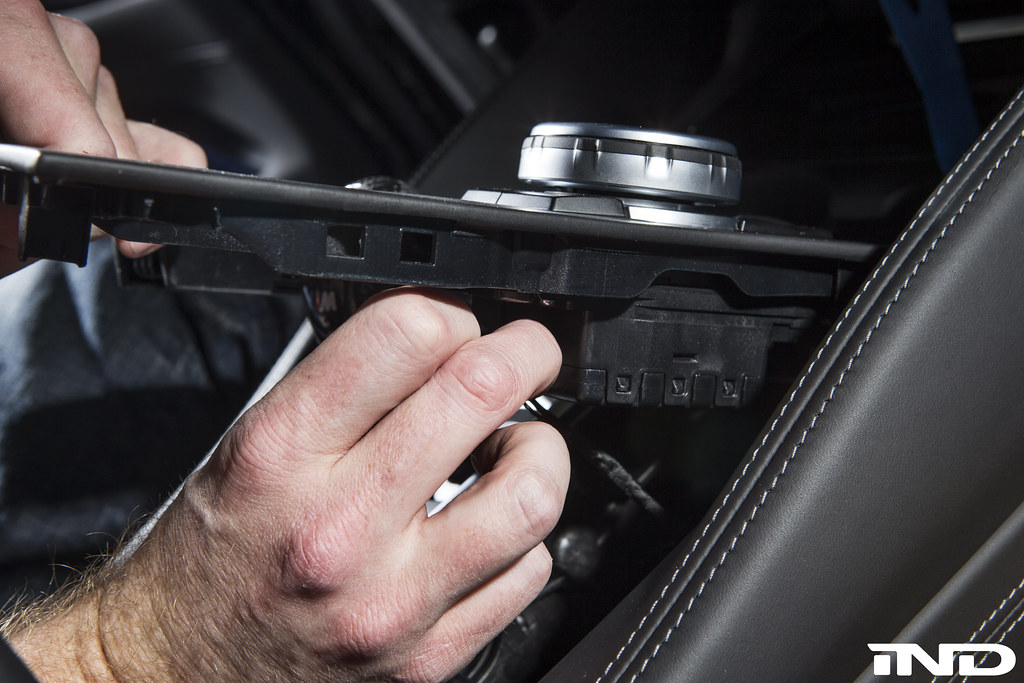 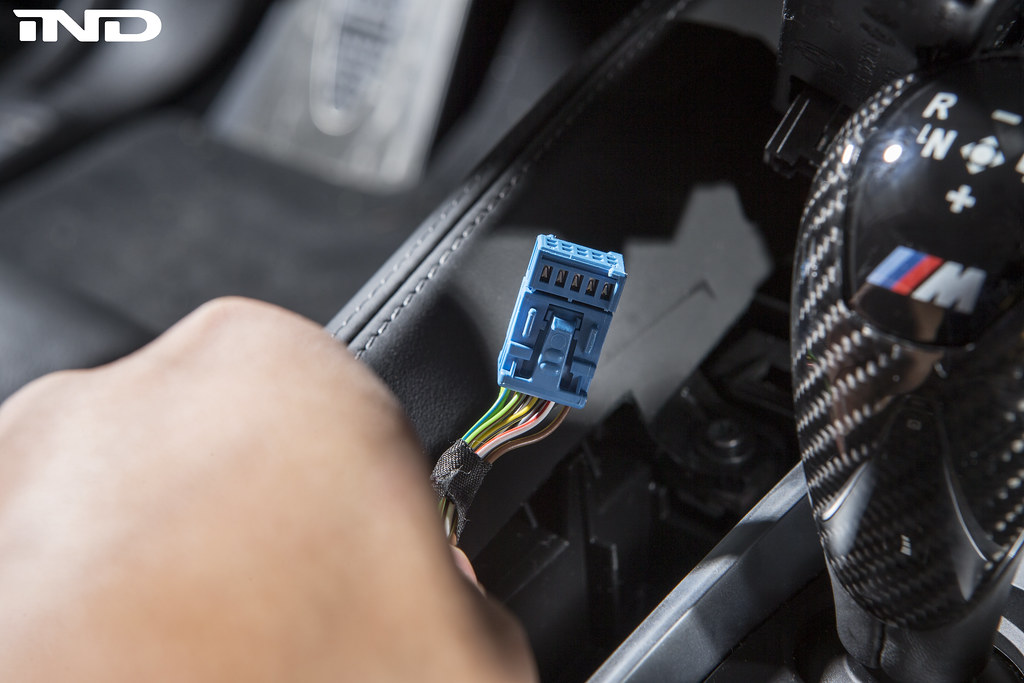 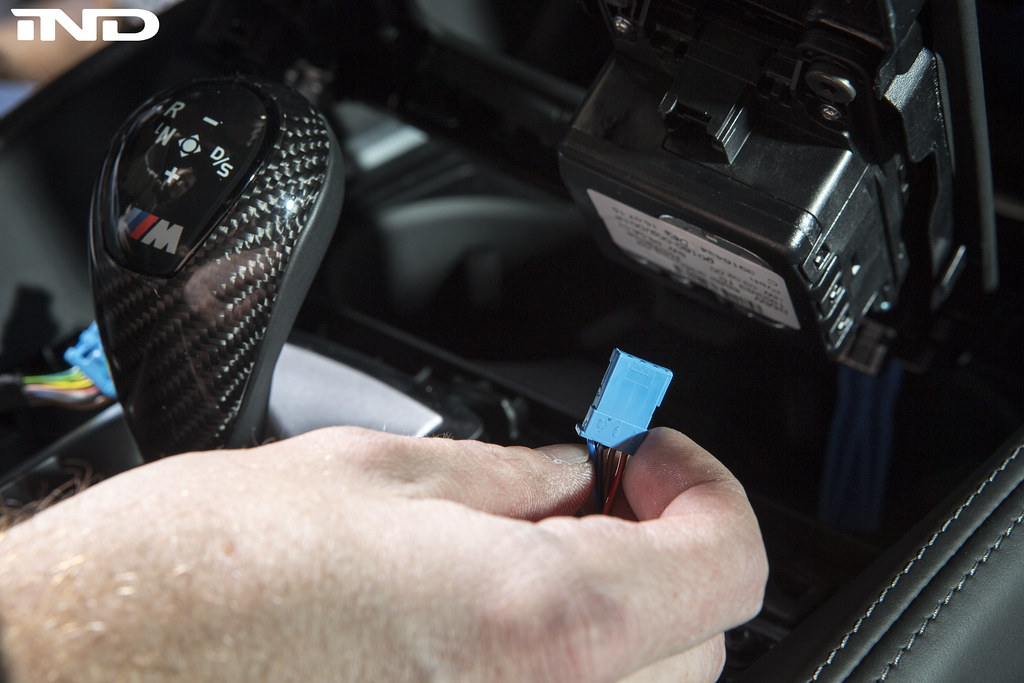 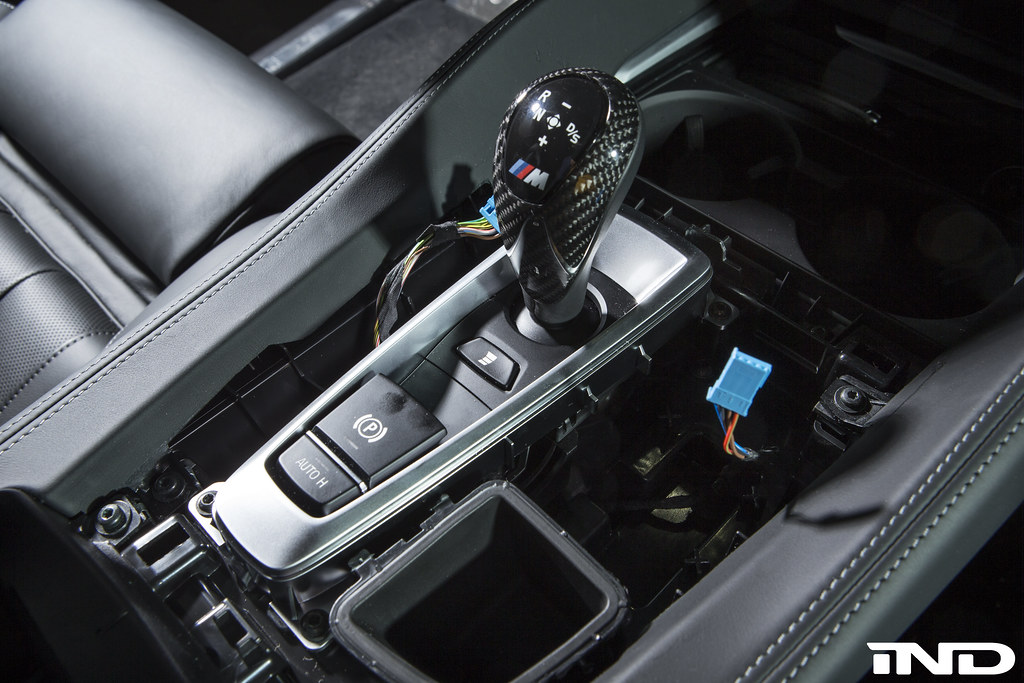 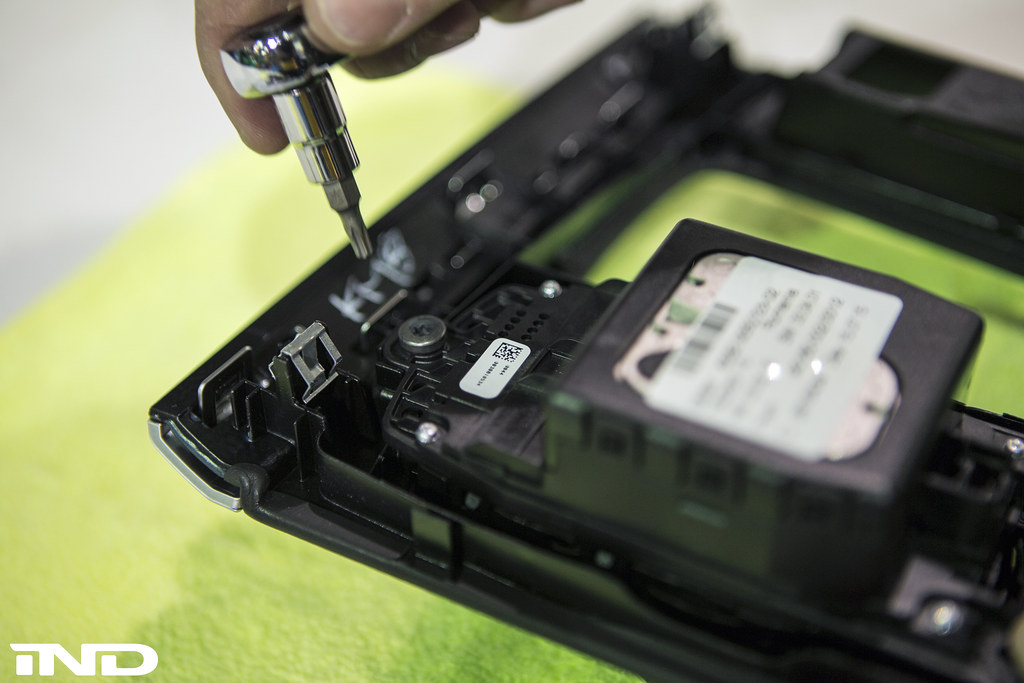 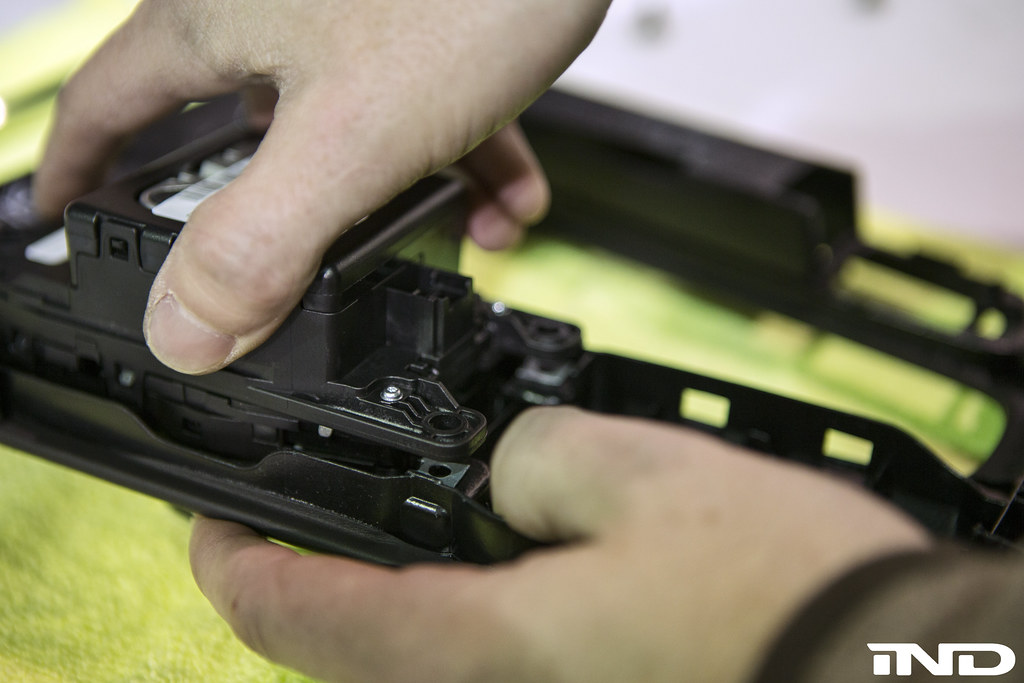 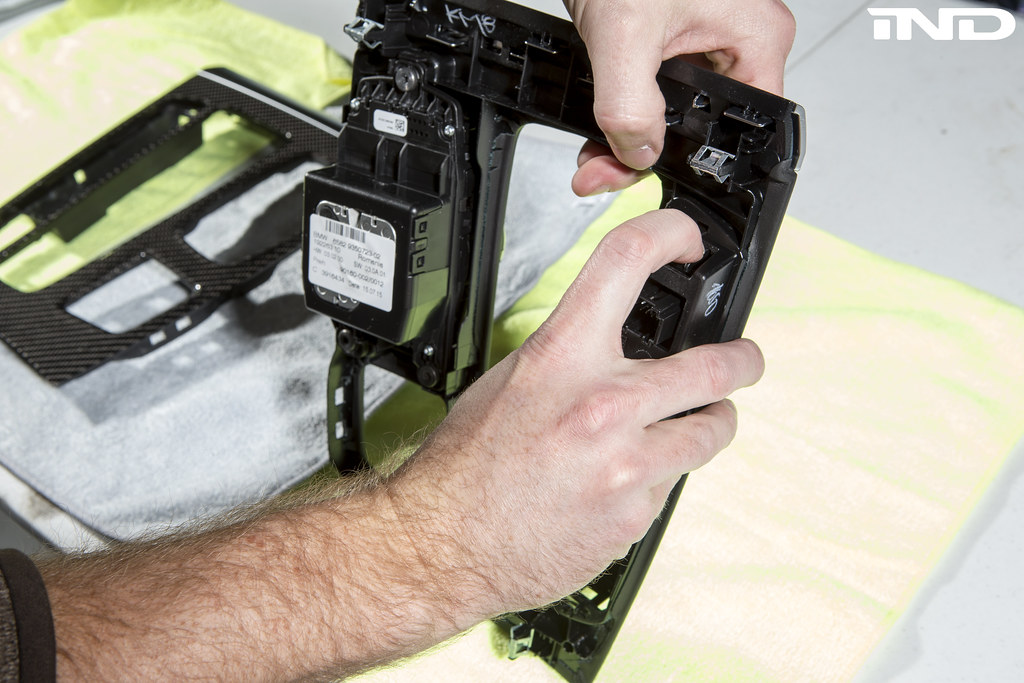 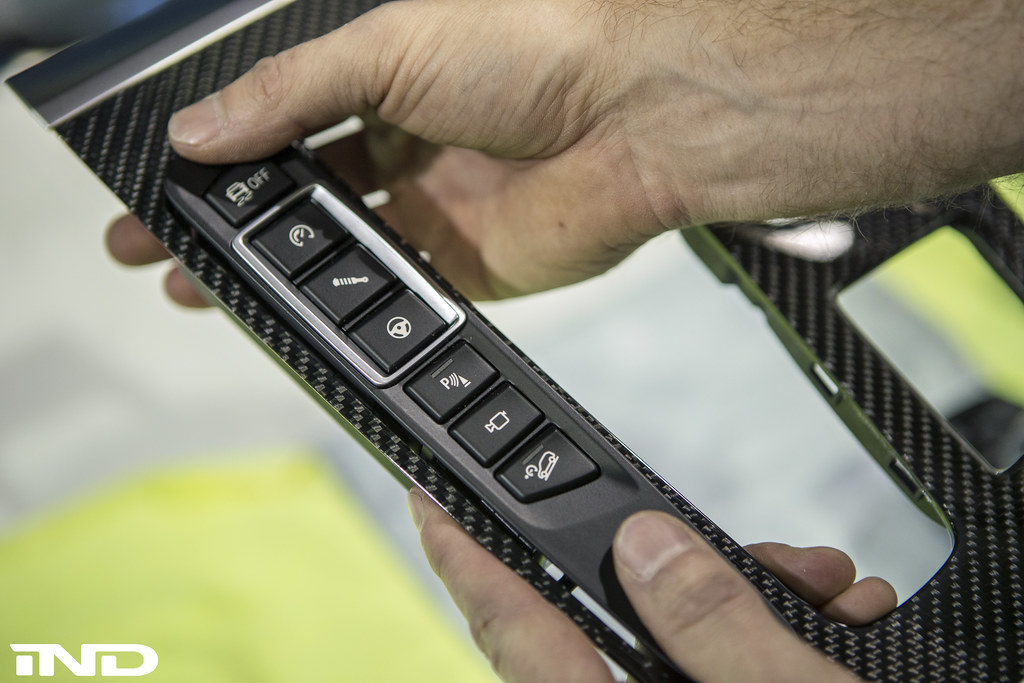 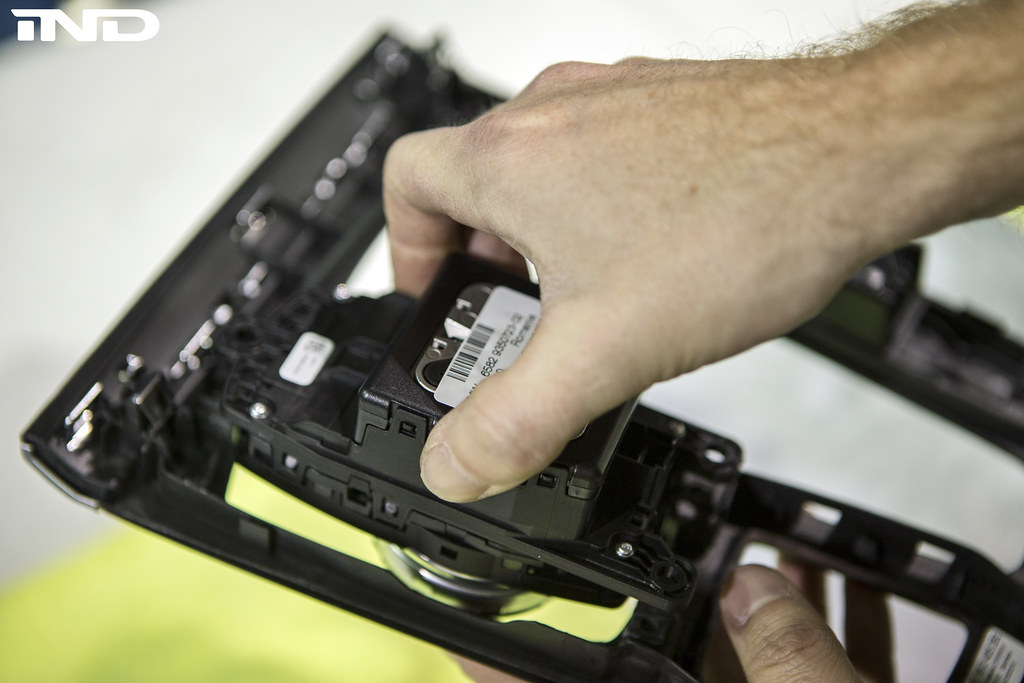 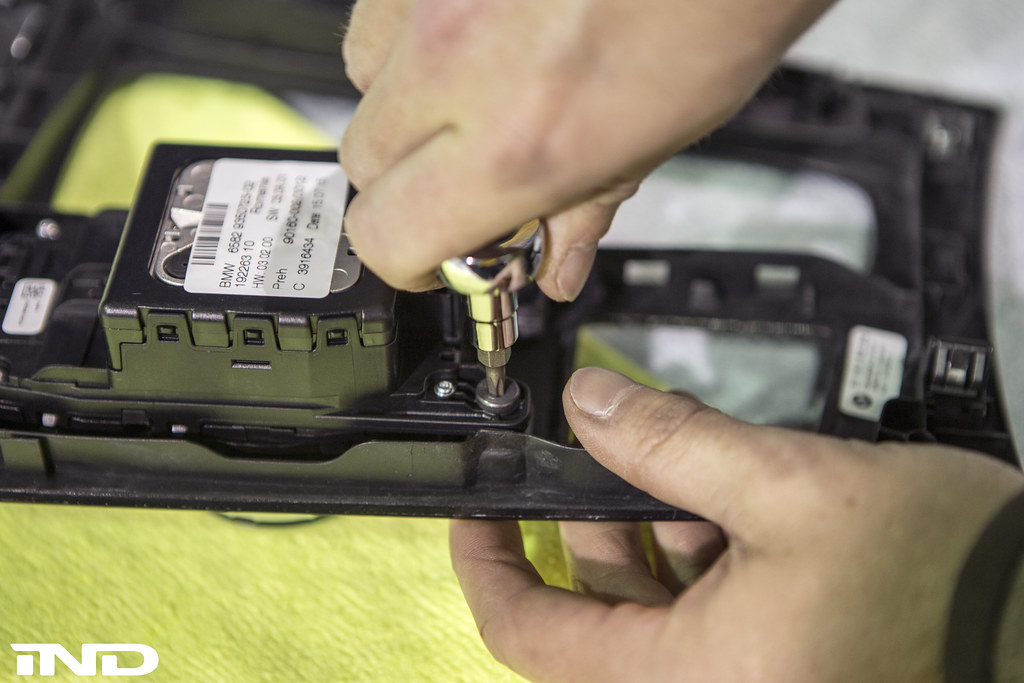 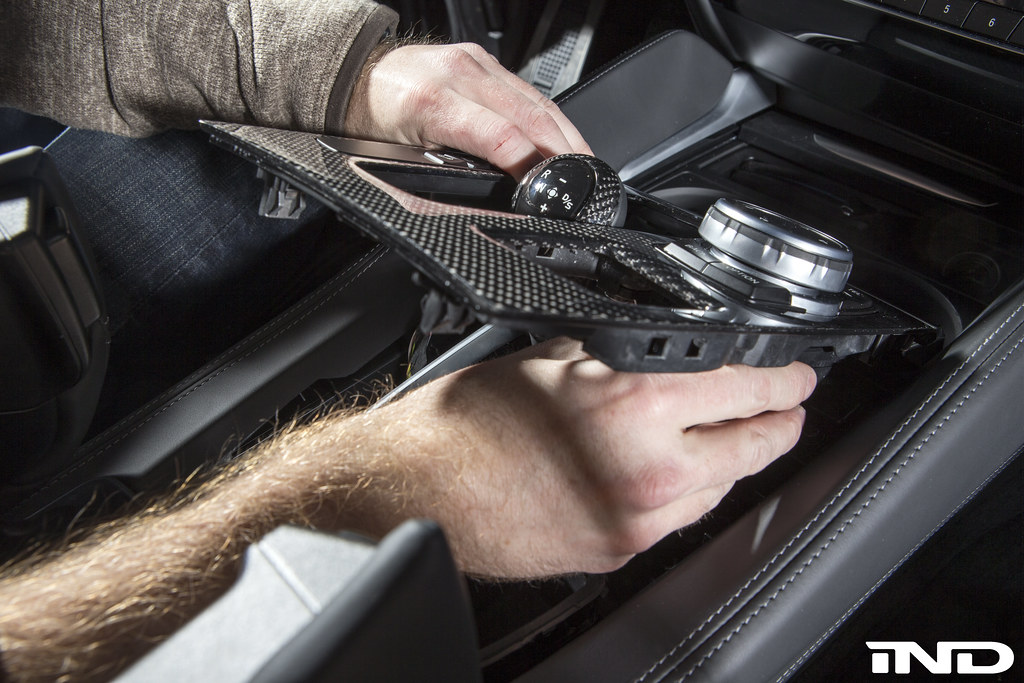 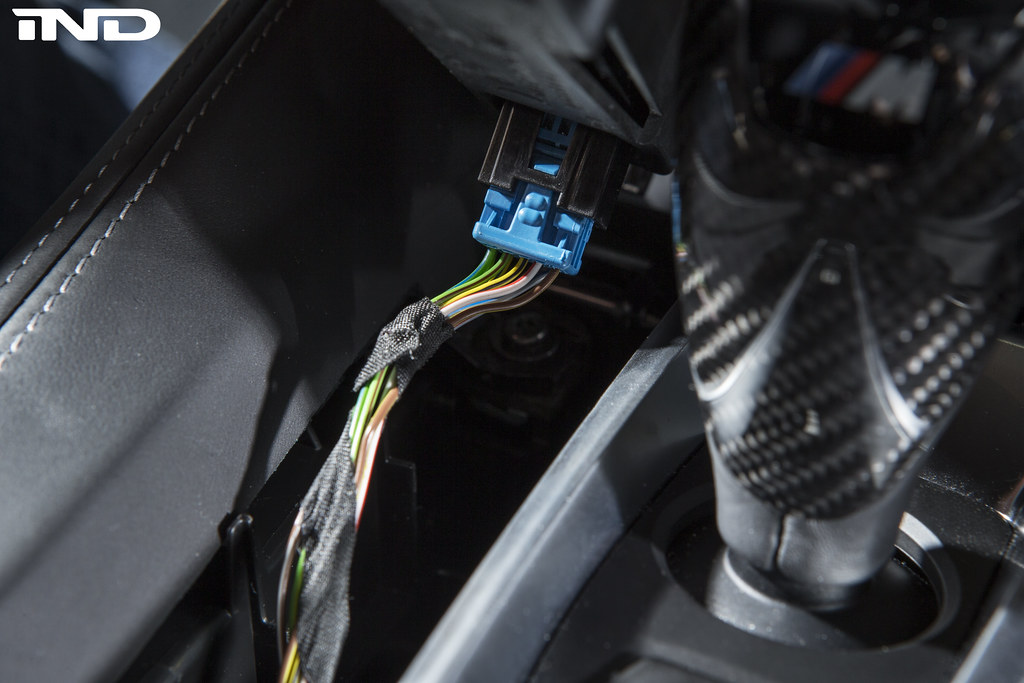 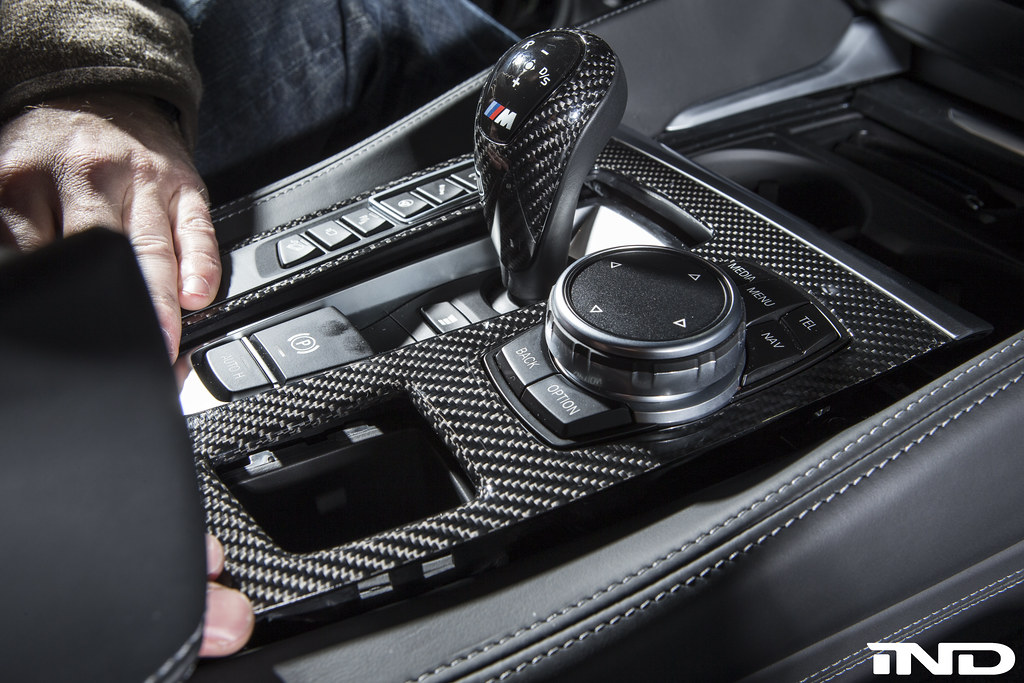 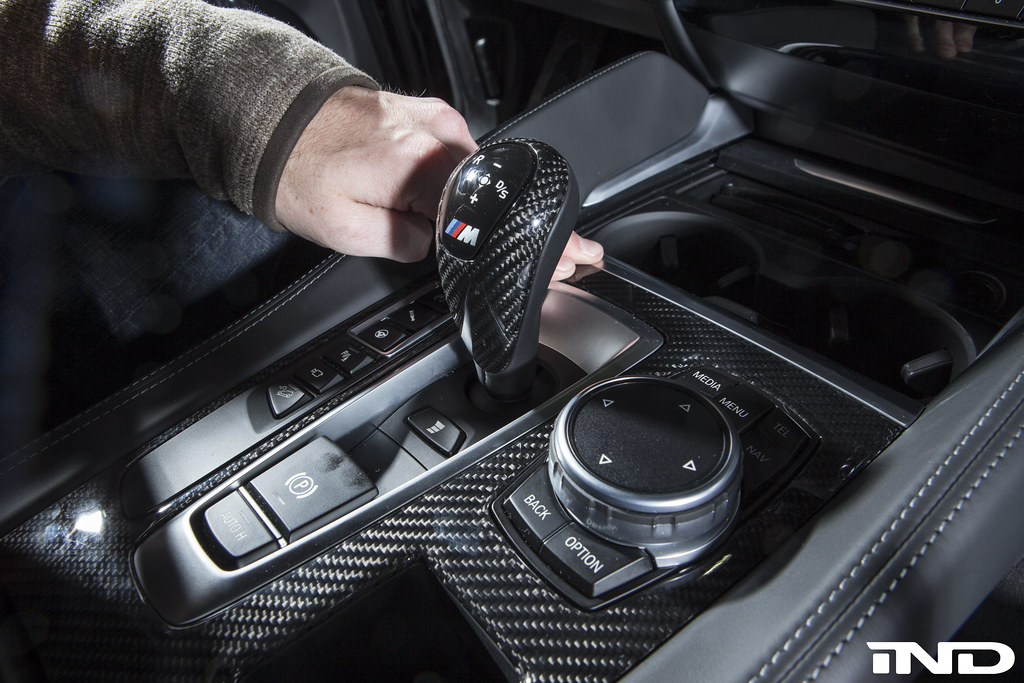 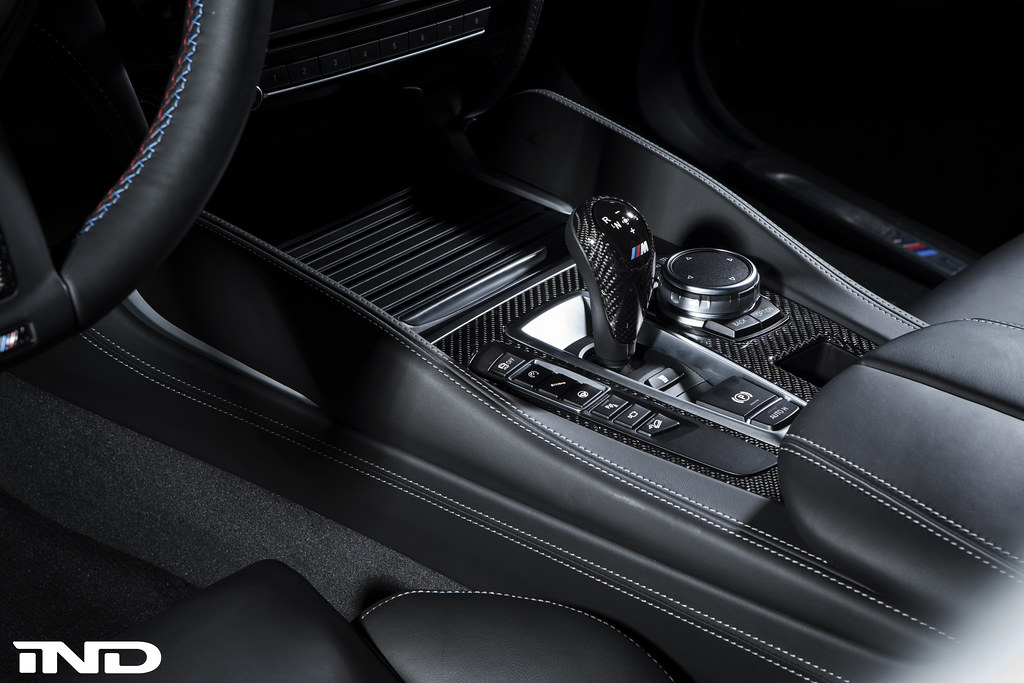 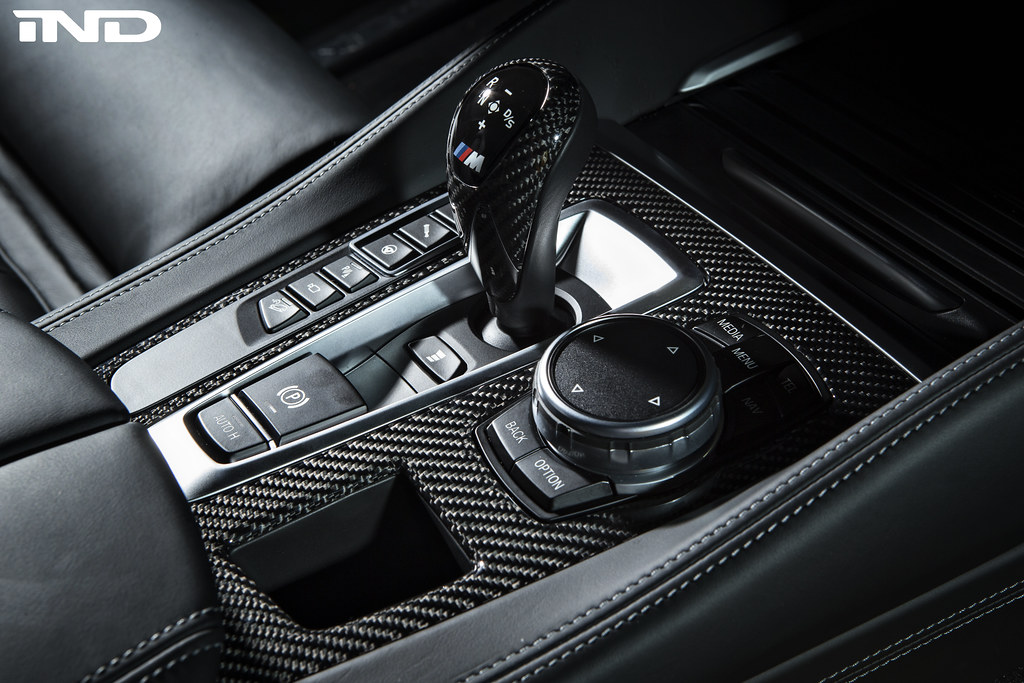 Last edited by Ryan@IND; 07-24-2017 at 04:31 PM.. |
| 11-25-2015, 06:29 PM | #2 |
|
BeastM3r

1298
Rep 1,658
Posts |
U guys make this for E70 ? Thanks
__________________
MORR WHEELS - VORSTEINER HOOD - FRONT LIP-CF REAR DIFFUSER - LED HEADLIGHTS - BREMBO BRAKES - Kw SUSPENSION - EISENMMAN - JB4 - SPORT STEERING WHEEL..!
|
|
Appreciate
0
|
| 11-26-2015, 12:08 PM | #4 |
|
Major General
  
1121
Rep 7,062
Posts |
big tip is to open the center armrest. The trim is recessed a little into its top end
__________________
E90 Build Thread (SOLD) http://www.e90post.com/forums/showthread.php?t=809436
F15 Build Thread (SOLD) http://f15.bimmerpost.com/forums/sho....php?t=1064084 |
|
Appreciate
0
|
| 12-01-2015, 10:14 AM | #5 |

1847
Rep 7,634
Posts |
|
|
Appreciate
0
|
| 12-01-2015, 10:36 AM | #6 |
|
Captain
    167
Rep 709
Posts |
Does the weave match the BMW CF? Any benefits over the BMW piece? (Assuming there is one.)
__________________
Cars: 2016 BMW X5M. 2017 BMW X1.
Bikes: 2007 BMW F650GS. 2014 BMW K1600GTL Exclusive. 2014 BMW HP4 Competition. 2016 BMW K1300S. |
|
Appreciate
0
|
| 12-01-2015, 10:50 AM | #7 |

1847
Rep 7,634
Posts |
|
|
Appreciate
0
|
| 12-01-2015, 02:02 PM | #8 |
|
Captain
    167
Rep 709
Posts |
oh, cool, thanks! Sorry if I missed that somewhere.
__________________
Cars: 2016 BMW X5M. 2017 BMW X1.
Bikes: 2007 BMW F650GS. 2014 BMW K1600GTL Exclusive. 2014 BMW HP4 Competition. 2016 BMW K1300S. |
|
Appreciate
0
|
| 01-26-2016, 12:28 AM | #9 |
|
Major
 
697
Rep 1,328
Posts |
This is a great mod along with the shifter if you have carbon trim.
I'm surprised that I haven't seen anyone replace the I drive controller with a ceramic version from the F15 50i/M50d. Checking eBay, they're about $300 which isn't exactly cheap, but it would finish that area off. |
|
Appreciate
0
|
| 04-11-2016, 07:29 PM | #12 |
|
Registered
0
Rep 2
Posts |
A couple notes on my panel install....
To aid others trying to do this install, I have a couple suggestions based on my experience this afternoon:
-I would recommend blue taping around the console, and the silver area around the shifter, as well as the front of the open doors to the center storage area- also recommend taping the two front corners of the console - scratching the leather would make this a bummer overall. -I popped the front 2 clips easily, but couldn't get the back clips until I used an interior pry tool, and even then it took more muscle than I would have expected. The pry tool was critical for me. I pried between the little cup behind the iDrive toward the back of the console. -It took a long time and a lot of pulling to get the large blue connector on the left off. -The small blue connector to the iDrive would not come off....Finally, I tilted the panel on its side and removed the 3 torques screws...frankly, I think this is an easier way to do it. -I also taped the front of the new pane before installation to make sure I didn't accidentally push the sharp corners into the leather around the console. -I tested all of the functionality of the buttons/iDrive before final install (pushing down the clips) of the console. -I first pushed down the back clips, then adjusted the little "cup" holder behind the iDrive until the console came into alignment with it, and finally, gently, clipped into place. These kind of things always seem to take a lot longer, and provide more headaches than expected...would have been a snap if the clips released more easily, and the blue connectors just popped out, but there you go. |
|
Appreciate
0
|
| 09-03-2018, 08:09 PM | #13 |
|
Private First Class
 47
Rep 123
Posts |
Any step by step on changing the cover to the shifter? Want to upgrade to a carbon fibre shifter. Thanks.
__________________
18 BMW X5M
20 Mclaren 720S Spider 19 X7 20 992 C4S 15 458 Speciale |
|
Appreciate
0
|
| 09-03-2018, 08:17 PM | #14 | |
|
Living the dream

4597
Rep 2,194
Posts
Drives: X5 w/MPPK, MPE & RC GTS Black
Join Date: Dec 2014
Location: The Lone Star State
|
Quote:
2. Unscrew the retainer screw 3. Remove stock trim piece 4. Reverse order That was how I did it on my F15, Iím sure itís the same on the F85/6. |
|
Post Reply |
| Bookmarks |
|
|